Dishonored 2 how to open the door. Stilton's backyard
Ship "Fallen House"Meet with Anton Sokolov and discuss further actions with him, and then take the boat to the Dusty Quarter.
In this mission you can find:
– Runes – 5.
– Alien Altars – 1.
– Amulets – 8.
– Drawings – 2.
– Pictures – 3.
Go to the room where Hypatia was. The woman is not here, but you can listen to her audiogram. Go to the captain's cabin and talk to Anton.
There's nothing to fix about Scary Wales this time around, but there's almost nothing to understand. But Sokolov began very beautiful picture about you, so you got it, which is nice. Get your debriefing from Sokolov and go to town. Go up the stairs where Sokolov drops you and heads into the dust area. Your first goal is to find Meagan.
Stilton's backyard
Head to the top of the stairs, but don't go outside yet. Turn right and right into the far passage through the lower window through the stairwell. Watch the window carefully to make sure you don't surprise the patrolling guards. The boxes to your left will allow you to climb up to the roof, where you can treat the guards as you wish. 
Once the guards have been processed, turn off the windmill casting a wall of light.
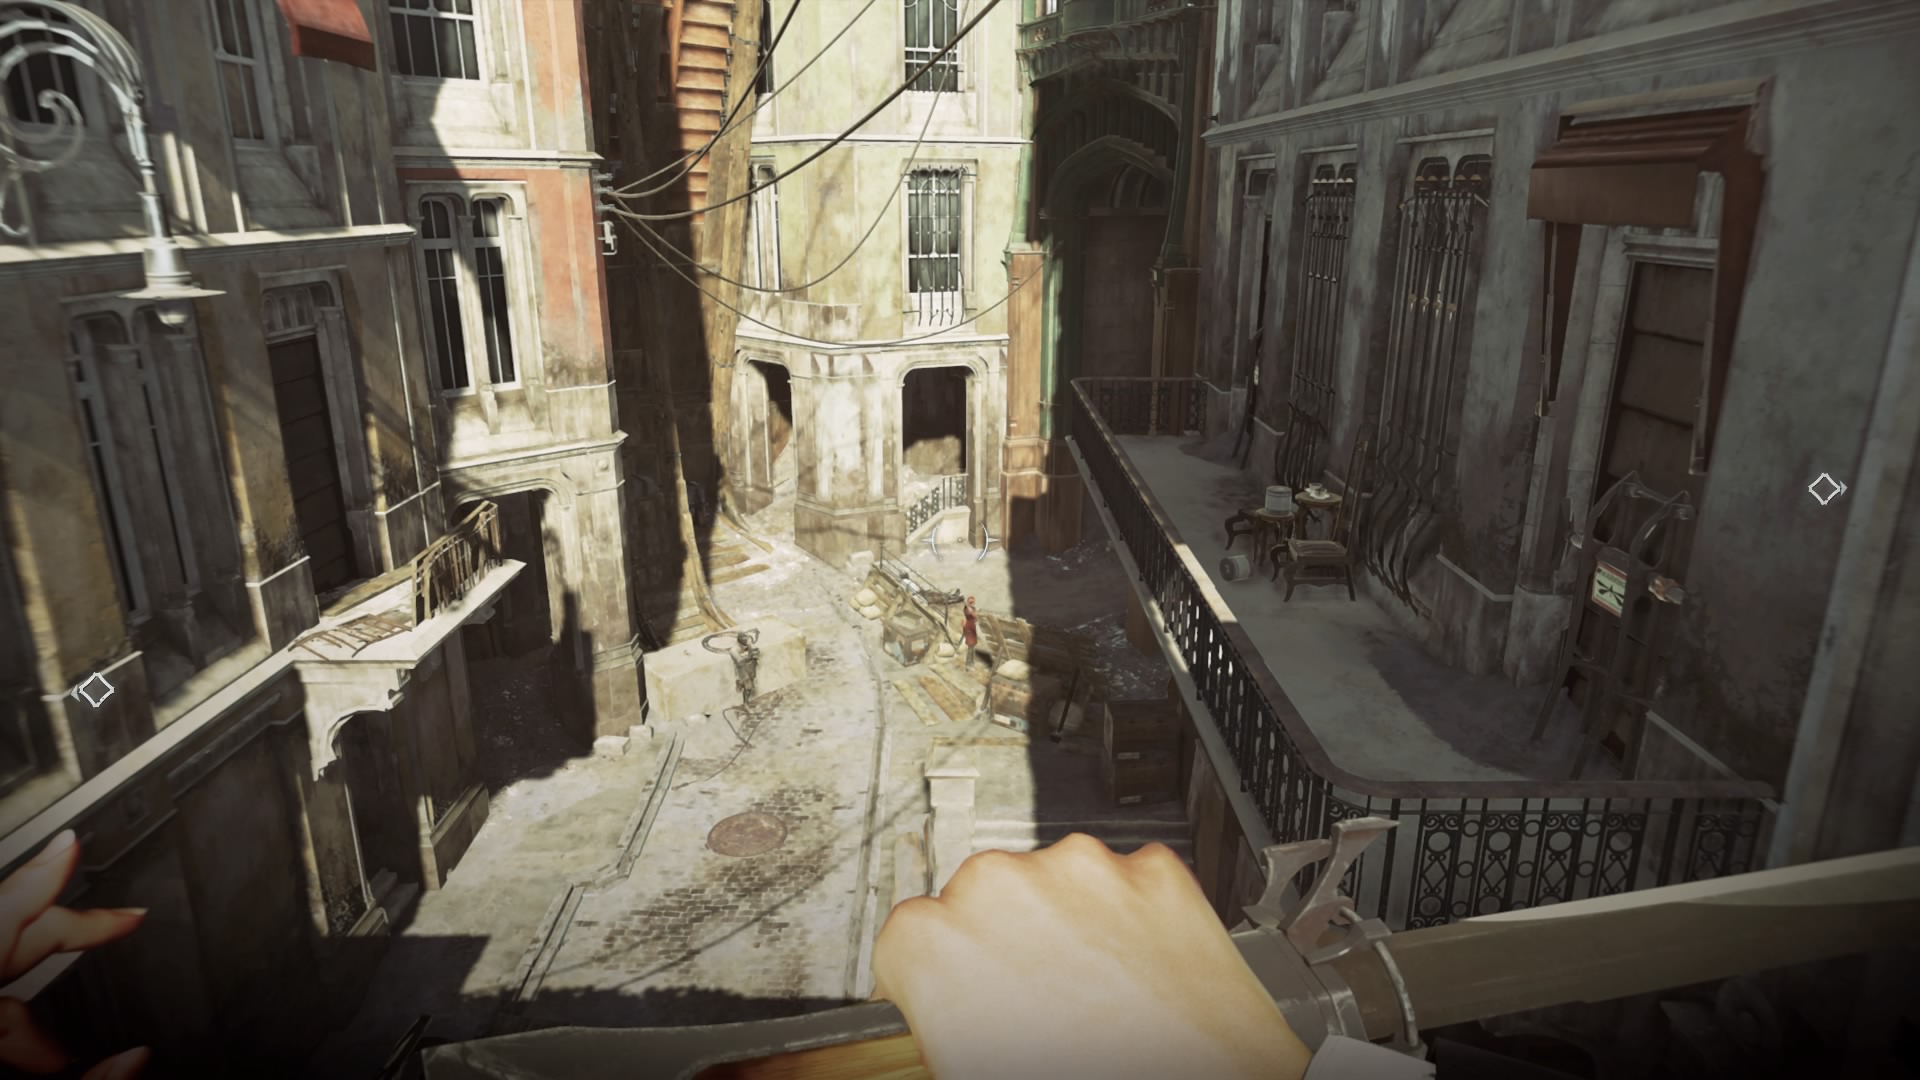
Dusty Quarter
Go through the Dusty Quarter and enter the mansion of Aramis Stilton: he keeps some important secrets Delilah. Viceroy High Overseer Byrne and his pious subordinates are engaged in a protracted war with Paolo, the leader of a band of moaners. Both Byrne and Paolo will help you, but both will demand something in return.
A total of four guards patrol the ground. Use a lamp post to get a better angle on them, then pull them all together and pull them out. Go to where the wall used to be and immediately turn right - on your way closed door. Go up to the second floor and go through the bathroom to find another door.
Open the door to make things less awkward. Meaghan tells you about your options for this mission, which we will ignore. Go out onto the balcony. If you can read the solution key and logic yourself, you'll get the Eureka achievement and can basically skip this entire mission. Luckily for all of us, we can find the answer elsewhere. The process and results will become clear later in the mission, but we're not going to pick sides.
Having arrived at the place, go outside.
The Rise of Batista
Climb higher and see light wall. Dust from the quarries will periodically appear in this place. You can use it for your own purposes. Enemies will have difficulty seeing you!
There is a building to the left of the wall, about 30 meters away. Climb up and neutralize two opponents. Go down and deal with the remaining guards. To turn off the light wall, you can use the installation kit. Fortunately, by this point you should have found several pieces in previous missions.
We will ignore, knock out and punish both sides equally. Go through another doorway - it is to the left of Jindosh Castle and is decorated with warden masks. This is Howler's territory and you will be attacked in plain sight as soon as you pass the signs without trespassing. First we'll go to the black market. If you're not interested, skip to the next section. You're going to be coming back here, so you can always save it for later when you have more money.
The black market is down the stairs on the right side of the street. Since you are on the safe side of the "No Trespass" signs, you are free to move around, jump over the railings, and drop down. There is a soup kitchen and a lot of people sitting around, but none of them will bother you. The market is behind the green door to the right of the soup kitchen, but don't break in without checking the keyhole first. There's a couple of Howlers shaking the shopkeeper. Watch their conversation and wait for them. When they turn around, move out of the way and let them pass without seeing you.
Go forward and climb into the building on the right. After destroying the hives, follow deeper into the house and jump higher. After opening the door, talk to Megan Foster.
You will be faced with a choice. To get to the Stilton estate, you need to kill either Paolo or the caretaker. After this, you will need to take the dead body to the one you left alive. Or you can look for another way to get into the estate without helping anyone or killing anyone.
We covered how to rob the black market in the collecting guide, so we won't go into that here. Once you're done with the black market, turn your attention to the blood-strewn building to the left of the entrance you originally came from. Make sure neither of you can see you and reach the balcony. going up the stairs, clearing out more blood race nests that you find. On the back side of the building you will find open window over a dead end.
Far reach the pipe above the floor above you. Remember: killing nest masters count against your kill count, which is why we suggest dominoes and sleep by throwing them. Clean up bloodsuckers and loot. place. 
Make your way until you find a balcony. You'll be looking down at the entrance to Paolo's Arm of the Crown pub.
If you want to collect all the amulets, you will have to kill Paolo. You need to kill Paolo twice.
Rune No. 1. Jump down from the balcony, break the boards behind you and go into the room under Megan's location. Behind the box, find the first rune in the area.
From this square, where the statue of Lord Serkonos is located, there are two ways. The path on the right leads to the door to Stilton's estate. Listen to the conversation of the townspeople - men and women. You will learn that a certain Duran tried to break into the door, but he was kidnapped by the caretakers. Here's a workaround!
There are only ten Howlers here, but only a few of them are stationary. If you're unlucky, they'll notice their buddies going out inexplicably. When they begin to group up to check on their fallen comrades, unite them again and take out another group. When you're done, return to the balcony you started from. Climb up the window and slowly approach the corner ahead of you. A lone guard caught the smoke a little further into the room. Peak around the corner to see if he's looking at you.
Take him out when he's safe and move to the back of the room. Turn left to find a ladder. The next floor down will take you to Paolo's room. Kill everything and find the Outsider Temple. However, keep crouching everywhere because there are still more guards around. Check the small room next to the stairs - you can climb through the small window high on the wall in Paolo's office - for two more guards. Throw something to get them out. If they are not here, be sure to check here after your first encounter with Paolo.
Take the other path. To the left is a wailing checkpoint. You will be warned that you cannot go further.
Rune No. 2. Before the checkpoint on the left side, find a boarded up door. Destroy the boards, go up to the second floor and somewhere in the far room, behind the screen, inside the cabinet, find the second rune.
Climb to the top floor and climb out through the window onto the pipe. Follow the pipe on the right, and then follow the pipe near the other building. There will also be an open window here. Get inside and kill the hive guards, and then destroy the hives themselves.
There are only two guards on the next floor, and one is a sleeper. There's another small window on the wall that you can use to stay out of sight. Dominate them and wait for the awake one to leave. Then you can go back to sleep and sleep and move around a little safer.
There is a balcony overlooking courtyard Crowns. There are guards there enjoying his breakfast and good book at the table right outside. If Paolo ends up in the yard - and he should be, but if he doesn't, he's probably in the basement and will be back soon - it's as good as anyone to get him out. 
All you have left to do in Crona's hand is neutralize Paolo. Once you take him out, he will turn into a swarm of rats. He will reappear in his room, surrounded by several people passing by.
Rune No. 3, No. 4 and Alien altar. Go out onto the balcony and find yourself in the “Witch’s Hand” location. Jump onto the canopy of the adjacent building and make your way inside through the open window. Go down the stairs and find the Alien altar in the far room, on which there are two runes.
Picture No. 1. Next to the altar is the painting “Faith of Moray and the Absolute”.
Tie someone up there and beat them out. Lut hid the body to find the reason for the bar's name and some bone rings. The last thing left to do is to get the basement. Use the window in Paolo's room for quick access to the scaffold from outside. Now it's time to head to the Operust Outpost. You can stay above the street for most of the trip. Go through the next doorway instead of going through it.
Far exit to the balcony on the right side of the street. There are two more Howlers before moving into the Warden's territory. Dominate them and knock them out. You've returned to neutral territory here, so you can safely walk through the doors into the Overseer's compound. Watch as you travel behind open windows and doors of apartments that you can loot.
Picture No. 2. In the next office hangs a huge portrait of “Paolo and the Unattainable Supreme Truth.”
Amulet No. 1 and No. 2(not sure - maybe Paolo drops three amulets). Go downstairs and deal with Paolo. Kill him twice, and then search the body and take two amulets. The first is called Iron Roots and reduces the chance that enemies will be able to knock down Emily or Corvo. The second one is called "The Hunted Beast". Low health increases the damage you deal.
Once you go through the door, reach for the pillar in front of you. Here you will be able to stick to the balconies. There are a lot of guards patrolling the street, but we won't be picking up any fights this time, so you can ignore them. From the Far Beam pillar in a straight line to the gate in front of the Outpost, then to the scaffold under the second floor window, and then to the chandelier - be quick here because the guard at the top of the stairs to your right can see you - and finally the ledge behind the barracks . Rush through the window into Domino's patrolling guard to sleep and shoot them all down.
Amulet No. 3. Below where the musicians played, on the right side find the descent into the basement. There will be a caretaker tied up there, and on the table beyond him you will find an amulet called “Trouble with Moving.” After the magical transfer, the witches howling against you may lose their balance.
Drawings No. 1 and No. 2. You will find the “Secondary Winding” drawing in the same basement as the previous amulet. You will find another drawing in the house, one floor below the Alien altar, which you have already examined.
Don't forget to steal the one on the right to get the confiscation key. Continue in a straight line to exit the room, then turn right. Stay on your haunches because there are still guards who can hear you. Continue right until you reach the top of the stairs. Knock out the guard standing there. Turn around and head to the confiscation room. There, the guard is typing on the table to the left of the confiscation room. Turn it off too. Use the key to find the rune inside the locked confiscation room.
Grab Paolo's corpse and take it to the caretakers. Go upstairs and talk to the Deputy High Overseer to find out the code to the door to the estate.
On the other hand, you can kill everyone and find Duran.
Amulet No. 4. When you are in front of the checkpoint to the Abbey territory, pay attention to the door to the building on the left. I need the key to the silver printing. But a little further along left side there is a boarded up window on the second floor. Jump onto the canopy, break the boards and climb inside. In the room on the left, find and pick up the Ignite amulet, which increases the damage dealt by grenades.
After another trip to the Void, where you talk to Delilah rather than the Outsider, you're ready to begin. There's nothing to fix on the ship this time, so just sweep up the items and then you can make an appointment with Dr. Hypatia and then talk to Sokolov and Meagan. When you're ready, head to take the boat into town.
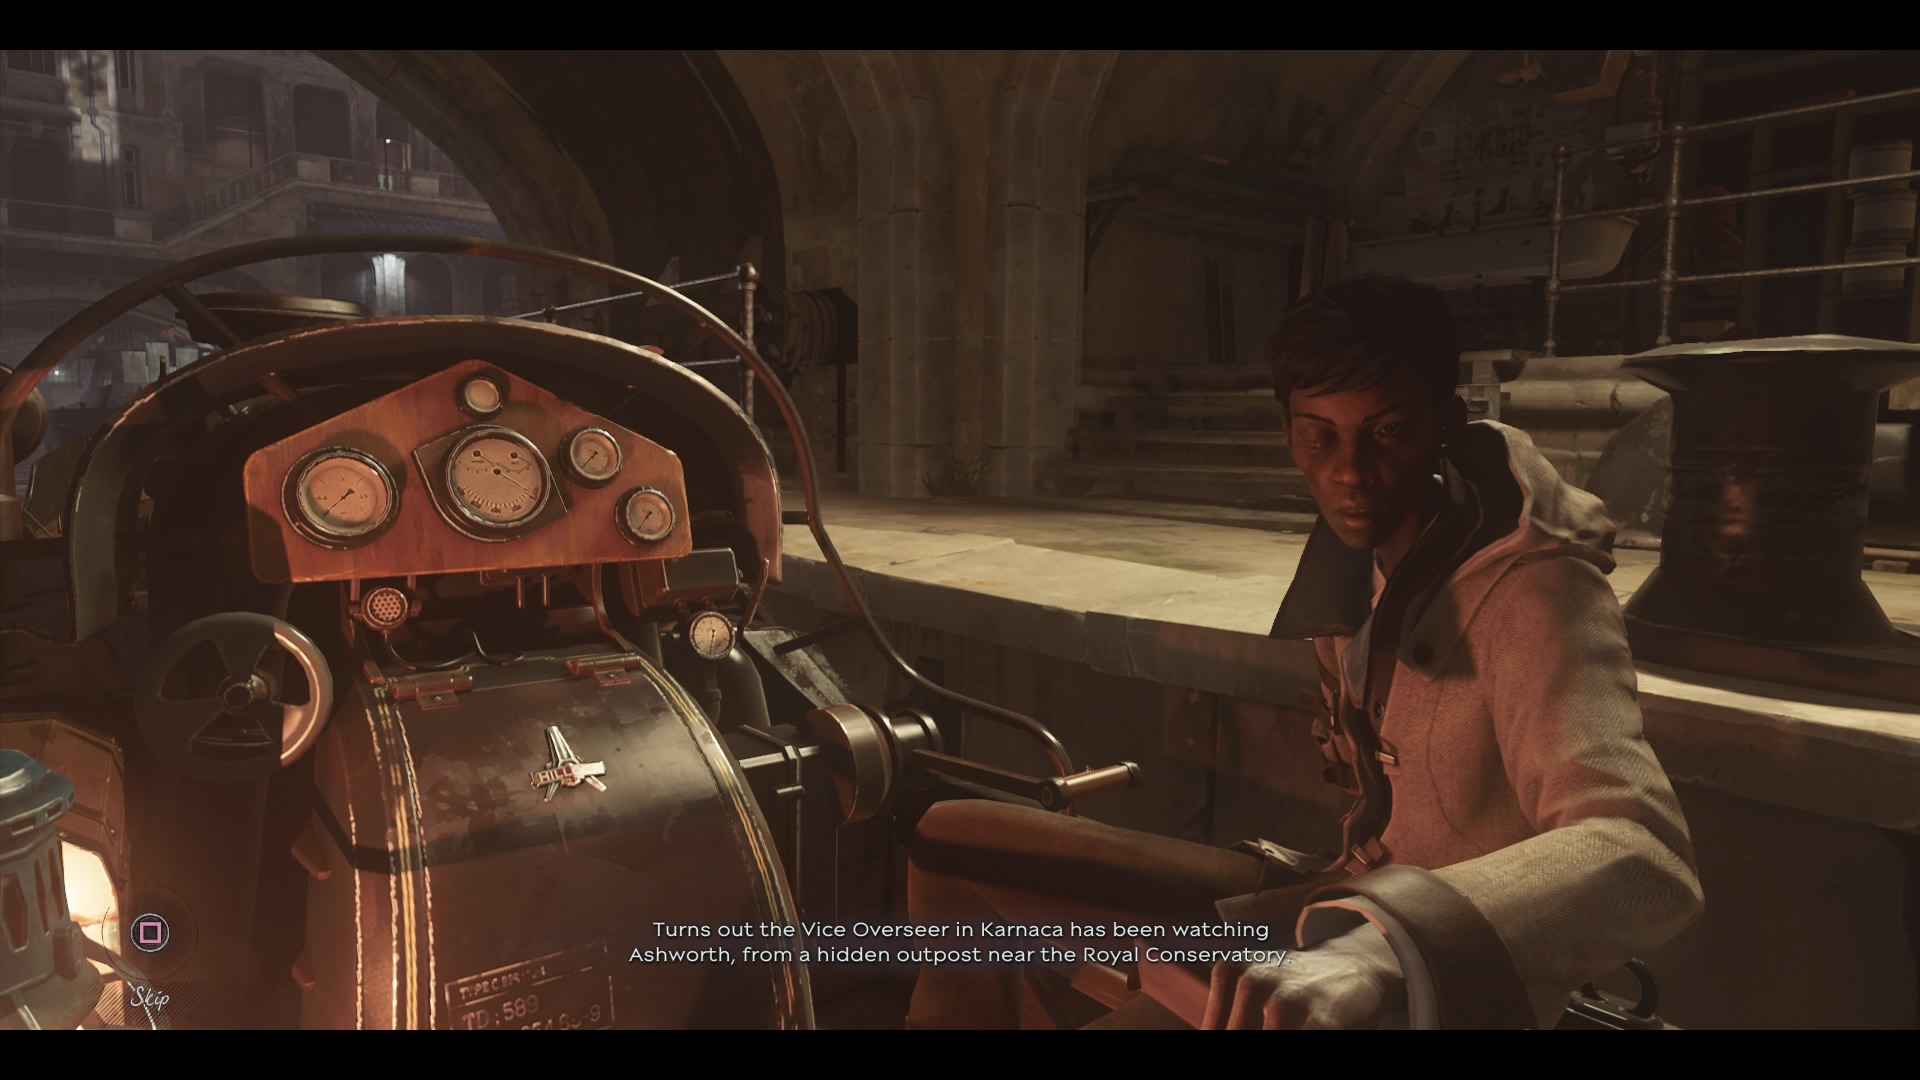
One trip, Meagan tells you that Vice Warden Byrne may have some information about your target, Ashworth. We'll get to his office in a minute. Go up the stairs from the docks. Immediately you will begin to see the guards that Meagan warned about. Your the best option- Start avoiding them immediately. Far beyond the first guard, then turn left into the black market.
Amulet No. 5. Examine the cabinets in the governor's office and take the Deep Grave amulet. The Grave Hound can die as soon as it emerges.
Rune No. 5. When you enter the Overseer Outpost building, go up the right stairs and enter the room ahead. Open the metal long box and take out the rune from it.
However, when you go through the gate, you will see someone asking for help up the stairs. There are three of them waiting for you to hurry up and help. Fortunately, there is another way. Instead of turning left at the guard, continue straight into the arcade. You can actually walk a long way to the guard at the top of the stairs. You'll come to a ramp leading into a building.

It will take you too long to pick up a couple more runes to unlock the latest upgrade. Stay on the ground floor and go through the building. In the back you will find several open windows that will allow you to keep an eye on your potential intruders. Get them out of here before they become a problem.
Picture No. 3. From the office of the Viceroy Supreme Overseer you need to go higher. Stand with your back to the window and see a balcony on the left side. Climb onto it using teleportation, and in the room on the left, find the painting “Undivided Time Discovers Aramis Stilton.”
So, if you killed Byrne, then go down the landing around the elevator, into the very basement. Here you must find an unidentified corpse. On the door of the room in which the dead body lies, there is a note - “Prisoner Durand.” Read it to update the task.

Now you can enter the black market without any problems. The shopkeeper will tell you about his friend, Mr. Sykext, who has information that the shopkeeper would like to know. Buy at least a rune and a safe combination from him and stock up on whatever you need.
If you prefer to keep the black market out, there are a few steps you need to take. Talk to the shop owner to get a side window, then buy any upgrades you want. From here, go through the window to the right of the store. Inside you'll see a chain with one of those breakable red couplings on it. Shoot the clutch to destroy it.
Go upstairs and on the cabinet on the left, opposite Byrne’s desk, find a note and the key to Duran’s room.
Amulet No. 6. Return to the bar, open the indicated door and find the Lucky Killer amulet in Duran's room.
Take the note “Code from Stilton’s house” from the table.
Go to the Black Market through the ranger camp. Go downstairs, kill the moaners and buy the map of Aramis Stilton's house from the merchant.
Amulet No. 7. To get this amulet, you will have to break into the Black Market door. This time, instead of a key, you need a code combination. So, from the merchant, go through the door on the left, and then turn right to see the right door. It needs to be hacked. There is a staircase nearby. Go upstairs and try to open the door - it is locked from the inside.
Go downstairs and stand with your back to the merchant's window. Exit here, turn the corner to the left and look for a hole in the wall. Climb through it. You will find yourself in enemy territory. Go forward and left. In the alley left hand there will be two slightly open windows. Look beyond to see wooden board on the door. Shoot it to break it. Now go up the stairs again and open the door. Find the calendar hanging on the wall.
Find the number highlighted in red in the fourth line from top to bottom. The first digit of the code combination is always “4”. The second and third are the same number in the fourth line. Enter the code, open the door and stun the merchant. Take the “Sliding” amulet, which increases the speed of tackles.
Return to the door to Aramis Stilton's house. IN top line choose five different surnames. Under each surname, select different jewelry, depending on what solution you found. By the way, you can solve the riddle yourself by reading the letter in the box to the right of the door. Once the combination is correct, the door will automatically open.
Combination for opening the door (yours may be different).
MISSION 7. A CRACK IN THE UNIVERSE
Three years ago, a strange ritual was held at the mansion of Aramis Stilton, somehow connected with Delilah Copperspoon and her followers. Once in the house, find out as much as you can about Delilah's secrets.In the seventh mission you can find:
– Runes – 3 (4).
– Alien Altars – 0.
– Amulets – 3 (7).
– Drawings – 1.
– Pictures – 2.
The maximum possible number of runes and amulets is indicated in brackets. It is possible if you decide to save Stilton from suffering.
Go forward.
Aramis Stilton's mansion
Rune No. 1. Go inside and go up the flight of stairs ahead. Enter the room and look for a rune on the floor on the left side.
Go into the next room until you find yourself in the bedroom. Find a hole in the floor and jump down where Stilton is sitting at the piano. Chat with Stilton, and an Alien will appear. Take the temporary compass floating near it.
By clicking the right mouse button, you can switch the timeline. The F key allows you to see through time.
Stilton is locked in this room, you have no choice but to use the compass. Click on the right mouse button to travel back in time.
Distraught Aramis Stilton.
Aramis Stilton Mansion - 1849
Eavesdrop on the conversation outside the door. You must find the code that opens the office. The door is locked, you need a master key. On the right wall hangs a calendar from 1849. Take it away. This is a required item for the "Souvenirs" achievement.
Return to the present, approach the grate located in the passage and move into the past to find yourself on the other side of the door. On the door itself you can find a note that says that the password is in the notebook.
There is a kitchen on the right side. To open the door located inside it, you will need a kitchen key. The door is currently locked. Walk to the end of the hallway to find yourself in a living room with a long table. Deal with the enemies and search the chair on which the leg of one of the guards was. In addition to the wallet, there is a universal key. In the past you will run into a huge metal door. Go back to the present and go forward, then go back to the past to continue game Dishonored 2 per site
Picture No. 1. In this room there will be the first painting, which is called “Contamination of Rats and Weepers.”
Drawing No. 1. Inside the round safe is a blueprint for the Powder Chamber Hinge.
There is a statue suspended in the center of the room. Use your sword to break the red mount to drop it. Return to the present and you will see that the statue is no longer blocking the hole in the wall. Make your way through it, return to the present and go to the end of the corridor. Universal key open the door.
There are just no enemies here great amount, so try not to catch their eye. Go left, past the elevator. Go down to the basement and deal with two enemies. One of them was looking into some hole in the wall. To the right of the hole there is a note that tells you about the leak in the basement. To the left of the hole behind the glass, find the red valve. Take it, climb up the crates and throw it into the hole.
Using the compass, return to the present. At this time the hole is larger, so you can crawl through it. Do so. You will find yourself in a flooded basement. Pick up the valve and throw it behind the bars into the next part of the room. In the present, swim past this grate, which is not blocking the path. Climb onto the protruding part of the cabinet, above the water, and go back in time. Select the valve and insert it into the mechanism on the wall. Turn the valve to shut off the water.
Rune No. 2. Now in the present there will be a rune on the box on the left. (the room will not be flooded).
Rune No. 3. Climb the stairs to the top floor and find a locked door that leads to a room with a rune (use the heart). In the present, to the left of the door, around the corner there is broken window. Get out and follow the metal frame along the building, and then climb inside through another broken window. Go back in time, kill the enemies and take the rune.
Drawing No. 2. Take the elevator to the top tier and on the workbench with a vice on the right, find the drawing “Spiked Grenade Casing.”
Amulet No. 1. It's called "Water Essence". In the past, call the elevator in the basement, not far from the hole through which they climbed to turn off the water. Enter the elevator and climb onto it. Climb up to some ledge, and then go back in time to the present. Jump into the elevator car and take the amulet, which slightly increases your swimming speed.
Amulet No. 2. On the main floor, next to the elevator, there is a locked door ajar. In the present tense, there is a nest of corpse wasps here. In the past time you can find an amulet. To get into the room, walk past it in the past tense, leaving the door on the right, and turn the corner to the right. There is a table here. Climb under the table, crouching down, and then move in time to the present (you will need to choose a place where nothing bothers you). In the present tense, instead of a table, there are some debris here. And you will find yourself right under the rubble. Make your way through the hole into the room with the beehive.
In the past time, you will find a safe, inside of which lies that same amulet. Also on the floor is the corpse of a wolfhound, and under it is a note. It was because of the wolfhound that a nest of corpse wasps formed here in the present tense. Open the oven door on the left, throw in the corpse of the wolfhound, close the door and press the red button.
Now there will be no bees' nest here. Return to the present and you will see a fallen safe. Look at its door to see the combination. Remember it, go back in time and enter it to get the “Ship Fighter” amulet from the safe. Drawing your weapon does not slow down your movement.
Amulet No. 3. Follow the amulet icon in present time. Move into the past to open the door at the top (in the present it is blocked). In the present tense you will see a hole in the ceiling. But how to get to her? After all, it is at the top that the amulet is located. In the past time, there are three levers on the side of the wall that lower and raise huge chandeliers. Align all chandeliers at the same height, closer to the ceiling. Take a running jump onto the nearby chandelier. Jump to the farthest one, since in the present time it is the one that remains in the position in which you installed it. Jump onto the destroyed beams and climb up. All this must be done in the present tense. On the floor, find the Swift Shadow amulet, which increases your movement in stealth mode.
Feel free to go back in time to the indicated door marked "Code" and move to Stilton's backyard.
Backyard Stilton
Go downstairs, kill the enemies and find the diary in the gazebo. Read it to find out the code to Stilton's door. Go to the indicated door and enter the Stilton mansion.
Stilton Mansion
Picture No. 2. In the Stilton mansion, go to the hall with the elevator. Go upstairs and in the present time find an open window. You have already used it to get into a closed room. Get out through the window to metal structure and go back in time. You will see two opponents. Deal with them. One of the enemies was standing on a wooden bridge, which was held in place by two red fasteners, the same as in any elevator. Shoot them and then return to the present. You will see that you can now climb up the wooden structure on which those same fasteners have been destroyed. Climb up, go forward and kill the two enemies on the right. Film "Quaternion Switching of the Executioner".
Go to Stilton's office by entering the code found in the diary. You can always view it in the “Tasks - Details” section. Watch the ritual. Go downstairs where the spiritual ritual was performed.
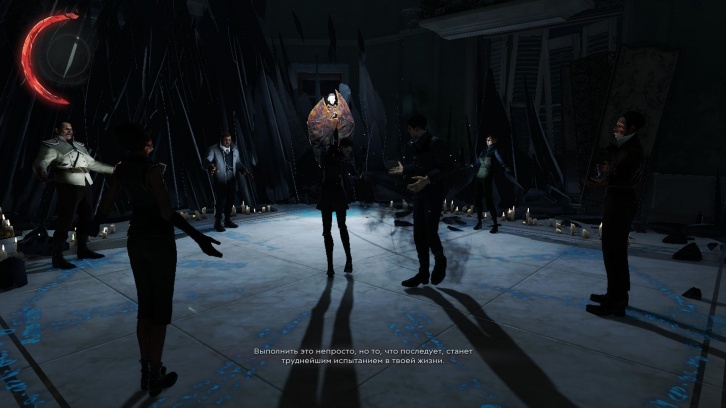
Spiritual ritual: the call of Delilah.
ATTENTION! Now your task will be to “leave the Stilton mansion.” If you do this, you will leave Aramis insane forever. But you have the opportunity to change time and save not only Stilton, but also his mansion. True, this had to be done at the moment when you were looking for the code combination. Read below!
Runes are one of the collectible items in Dishonored 2. Once collected, each one gives you one skill point. Having accumulated a sufficient amount, you can improve existing skills or unlock new ones. Some runes are quite difficult to find, and some can simply be overlooked. In this guide we will tell you where to find all the runes in the Dusty Quarter mission. There are 5 of them in total in the location.
Where to find all the runes in Mission 6: Dusty Quarter?
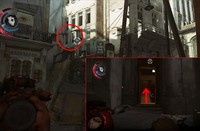
Rune 1: After talking to Megan Foster, look out the window. There you will see a courtyard with a statue in the center. Jump into it and turn around. Directly behind you will be a door boarded up with boards. We break them and go inside.
We go forward all the way and look to the right. There will be an overturned bedside table, and in it - the first rune of the Dusty Quarter mission.

Rune 2: We return to the courtyard with the statue. Behind it in the corner of the yard there is a passage, we go there:

We look around and see an infected building. In Dishonored 2 they are marked with a big red SEIZES! On the second floor level there is a balcony with open door. We climb there and go forward.
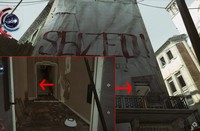
Before the stairs, turn left and go into a small room. It is there in the bedside table that we will find the second rune.

Runes 3 and 4: Both of these runes are located in the building with the sign The Crone's Hand Saloon. You will find it right in front of the building with the sign SEIZES! We need the far left door.
We go inside and go up the stairs to the third floor. There we go to the farthest room, always turning right. In it you will find an altar, and on it there are two runes.

Rune 5: Looking at the map Dusty Quarter so as not to get lost. We took the last rune in the saloon, marked on the map with the number three. Now we need to get to the caretakers' building. This is number five on the map.


