Dishonored door keys. A guide to finding bone amulets in Dishonored. Entrance locks of the towerDishonored Walkthrough. The Waterlock
Dishonored. Walkthrough
|

- general information .
06. Return To The Tower
"Dog Pit"
Dishonored walkthrough. Pub "Hound Pits"We go around our base in search of new things. If in the last task you participated in a duel on behalf of Lord Pendleton, then he gives 100 gold as a reward. If in the last task we left two other Boil sisters alive, then in the attic in Korvo's room a gift awaits us - a rune.
We're back with another level of collecting all the tiny bits of bone and magic that Emily and Corvo's powers do that do the voodoo that we love to do. This time around, we'll hide guards, alchemists, and possibly the notorious killer of the Crown's enemies around the beautiful secluded island.
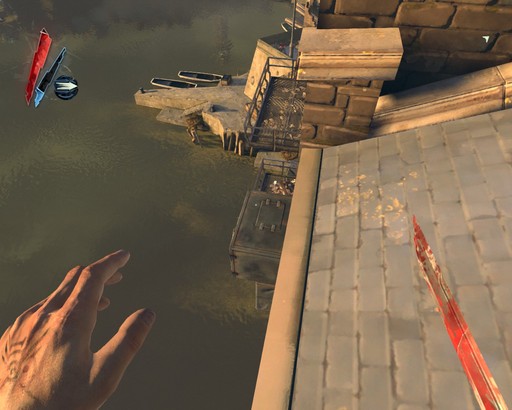
Bone Charm: Bitter Blood - Bloodstreams attack at slightly shorter distances closer to nests. To the left of the carriage you will see a break in the railing. If you come to the edge and look down, you should see a pipe and a rock coming out below. Proceed to the pipe and then to the rocky platform and follow the path around the corner to the right. Under the transportation platform, you will see a small boat washed up on the rocks, and nestling inside you will find your first level bone charm.
In the pub we approach the girl sitting at the table, she gives the task to find the girl Emily. We find it inside the destroyed tower on the coast. The girl also gives a rune as a gift.
Our next main task is to eliminate the main villain - the Lord Regent (Lord Regent, Hiram Burrows). We go to the boatman, we swim to the Dunwall tower.
Tower entrance locks
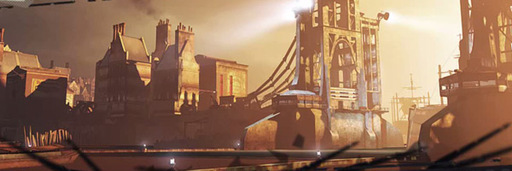
Dishonored walkthrough. The Waterlock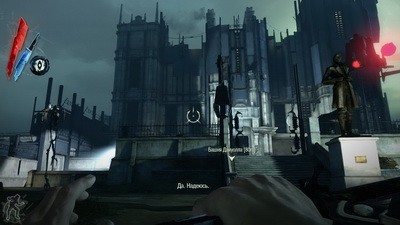
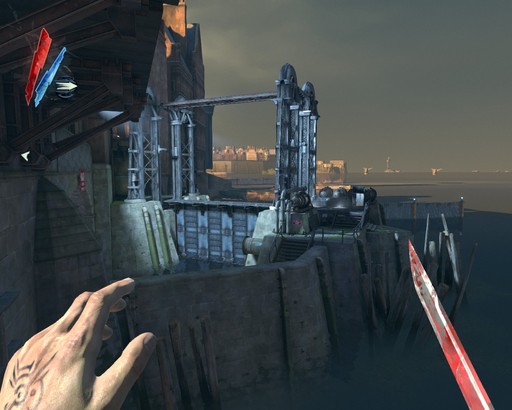
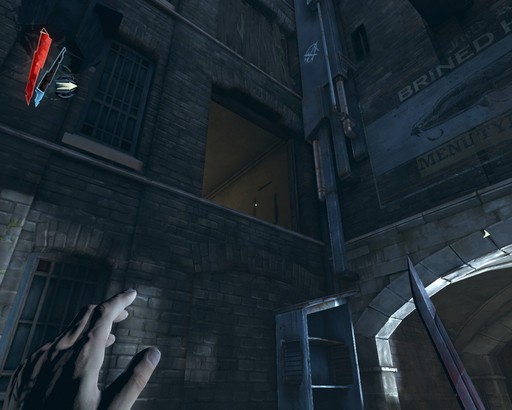
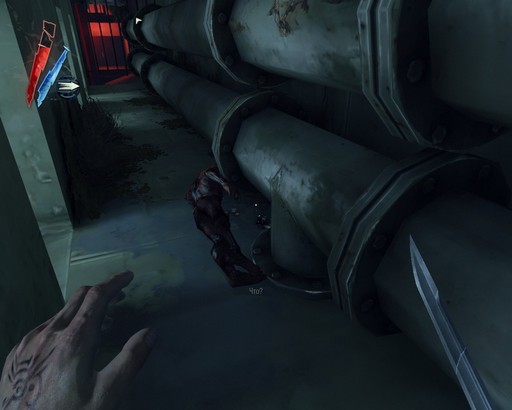
We jump off the boat, swim into the locks. (Further without the magic "transfer" or "agility" you can not climb up). We climb up the boxes and pipes, teleport to the ledge in the wall. We crawl forward along the narrow passage between the moving parts of the mechanism. We leave the passage, teleport to the ledge of the opposite wall, and from there we climb into a small window. Here we drag out the charred corpse, take bone amulet (1/2). From the corpse we go to the right, we leave through the window, we climb onto the balcony above. Ahead is an electric tower, we teleport past it to the left corner, there we extract a tank with a blubber and, thereby, turn off the tower. We go to the top of the building.
The next bone charm on the list is a bit tricky, but not terribly hard to stuff for your bag of tricks. From the carriage, you'll want to take the stairs to the left and carefully approach the large doorway into the hall. You should hear some guards talking about the Killer Crown in the small column to your right. Either quickly move past them into the large main hall ahead, or wait for them to finish talking and deal with them as soon as they leave.
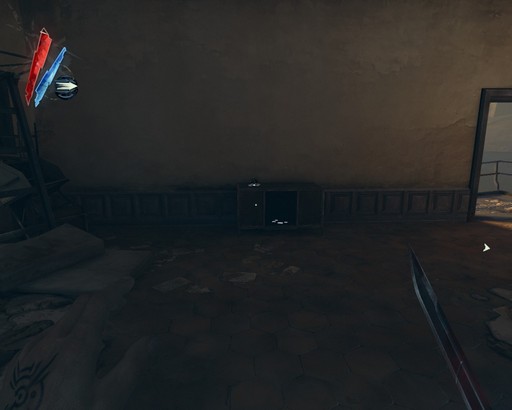
Either way, carefully enter the main hall and you'll see the Bone Charm in a small closet a few feet from the entrance. Be aware that the area is buzzing with guards, so be sure to keep an eye out for patrols and move. If you have Blink, this is a great time to take advantage of Corvo's arcane teleportation, but players using Emily need to be careful not to be spotted while crossing a few feet of open area into an office.
We put to sleep one guard in front of the entrance, another one - inside the upper part of the airlock. Take away from the second guard water lift side door key. We approach the electric wall, to the left of it we open the door with the key and move on.
There are a lot of tallboys and ordinary guards in the courtyard, the magic "time distortion II level" or "invasion II level" can be very helpful here. We need to go under the bridge, climb the stairs and turn right.
The first rune of the day is down the first corridor on your left as you enter the main hall. Generally, having a rune right out in the open would be fine, but this particular piece of Outsider goodness hangs right above the table in the main dining room for everyone to notice. There are about three guards on the table, including two at the table directly below the rune. Throw in two or three more guards patrolling the area as a whole and it's a tricky area to hide.
It's best to cut to the left as you enter the dining room and make your way through the kitchens behind the bulk of the patrols. From there, you can take out a few patrol guards without noticing them. The real problem is that the guards are resting on tables. We found what to sneak away tailgate kitchens onto a small screen behind two guards at tables, giving us access to a chandelier hanging over the common area.
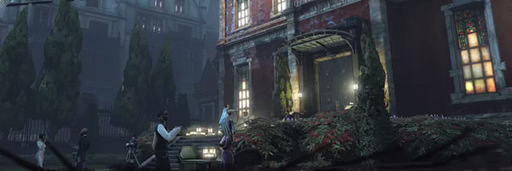
In front of us we will see the main entrance to the royal chambers, but on the way there is a high tower with a searchlight and a rocket launcher, you need to bypass it. From here we go along the left side, hiding in the bushes, we enter an inconspicuous door in the side wall. Here we will meet an engineer, you can not be afraid of him. We turn the valve on the 2nd floor, climb into the reservoir through the lowered grate. We move into one of the fish, swim to the other side of the reservoir. We get out, we get to the multi-storey scaffolding near the wall. We go down the stairs, neutralize the guards. We go into the room with the maid, put her to sleep, take the rune under the bed (1/4). On the stairs or by teleporting we climb to the very top of the scaffolding. From the top floor of the scaffolding, we teleport to the cornice of the building, go forward, climb into the ventilation shaft, and get inside through it.
Entrance locks of the towerDishonored Walkthrough. The Waterlock
From there, it's much easier to use the various bottles on the second floor to distract and separate the guards, or if you quickly get all three guards looking in the opposite direction long enough that you can teleport to the table, catch the rune, and jump back again.
If that doesn't sound like a good option, don't be afraid to pop out your crossbow and use lethal or non-lethal bolts to send in a few guards to sneak around easier. Sleepy darts have a long enough delay between hit and knockout that if you're quick you can hit two or three sides sitting at the table and then sneak up on the one who's left on a hard hug.
Dunwall Tower
Dishonored walkthrough. The Castle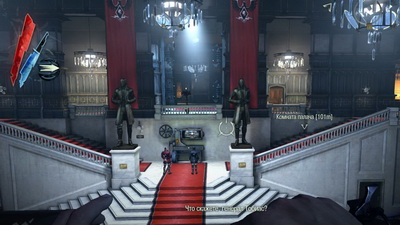
We get out of the ventilation shaft, we find ourselves on the ledge right in the middle of the main hall of the tower. On the ledge we go to the right, we enter the door. We take radio room key, hanging on the wall, take out the tank with the blubber, climb the stairs to the very top.
Our next stop on the road will take us to the rooftops where we will find the bulk of the rest of the runes and bone charms on this level. There are many ways to get to the rooftop throughout the level, but we found the easiest route without having to deal with the many guards in the area to get back to where you left the train car and up the stairs on the left. Just above the stairs you will see a large opened window, platform - teleport or get to the glass platform and go down to the bookcase just inside.
We will get to the broadcasting station. Here is a propaganda officer, you can not be afraid of him, he even agrees to help us. The officer tells how to deal with the Lord Regent without killing - you need to steal an audiogram with compromising evidence from his personal safe (the code to the safe is 935), and then bring the recording here and voice it to the whole city.
From the radio room we go down to the 2nd floor. If in the last task we took the key to all the doors of the Dunwall tower from Lady Boyle, then you can immediately get into the chambers of the Lord Regent: we go forward, go into the door on the left. If not, then first you need to go to the room with the maid on the 2nd floor, there take key to the lord regent's quarters. The chambers of the lord consist of a room and a balcony. Magic "dark vision" we look after the lord. When he goes to the balcony (or you can just put him to sleep), we quickly go into the room, in the chest by the bed we take the rune (2/4), we approach the safe, we dial the code 935 , pick up the audiogram and leave.
From there, look up and to the left and you'll see a dark metal gargoyle attached to the wall directly above you. Snap in and pull yourself out, then repeat the movement to access the upper supports and then jump into the railing and immediately head through the door on your left. You will hear a few guards stroking the door on the right, either ignore them or deal with them and move on.
As soon as you walk through the door, you will be on a small targeting time range. From there, go through the center door of the three directly in front of you, and you'll find yourself in the Outsider's temple, with two runes and a few words of wisdom from the Outsider himself, ripe for choice.
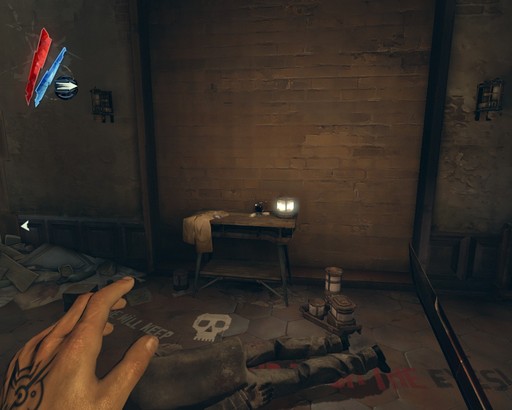
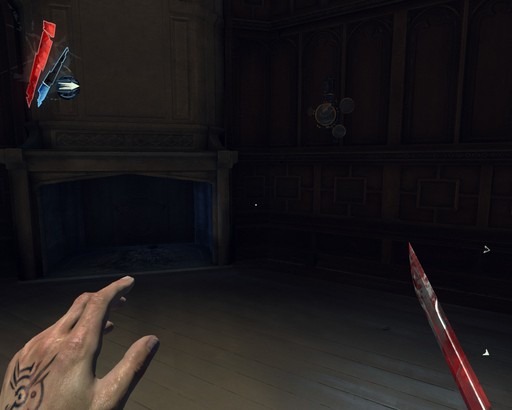
Before completing the main task, you can walk around the tower, look around and find all the secrets. In one of the corners of the second floor we find a movable lamp against the wall, press it, we climb into the opened entrance in the fireplace. We ended up in the secret room of the Empress, here we listen to her audiogram, read the note, take bone amulet (2/2). We go back.
Our next stop includes a few related runes and charms, as well as a lot of noise, so be sure to send out as many guards as you can before you start this section. From the Shrine of the Outsider, head back outside and run left over the rooftops to a tall, thick tower overlooking the main hall. Enter the dark alley between the tower and another building and jump onto the wrought iron shield next to the steam pipe.
From there, teleport to the roof and turn back towards the tower. You should see a small open hole where the steam pipe ends on a small platform. Jump inside and duck inside and you'll find a rune on a table on the left. To get the blackbone charm, jump back to the roof opposite the rune and climb up the column of smoke stacks a few yards from the edge of the building.
(Additional task (Kill the Torturer))
We go down to the first floor. In the northeast corner you can go down to the basement. Let's go down and see executioner, mocking the corpse, and a dog sitting next to him. We move into the dog, in her body we return back, we run around the corner, here we put her to sleep. We approach the executioner, put him to sleep (to perform additional task he needs to be killed, there is an opportunity to kill him not manually, so as not to spoil the statistics). Next to him we take a rune (3/4).
Turn around and face the tower again and direct the teleporter to the nearest edge of the opposite rooftop. Make sure you are on the very edge of the chimney and wait until your cursor tells you that you will automatically hide the end teleporter. If you are confident enough in your skills, you can also start running and teleport into the air.
From there, carefully roll onto the roof and you'll find the black bone charm in a large bird's nest. Look to the right at the elevator shaft and you will see a red button. Click on it and wait for the elevator to reach the top of the shaft. You should be able to see two rusty areas where the cables are attached to the car - either shoot or use your sword to break the cables and watch the elevator fall to the ground.
We return to the stairs, go up to the radio room, insert the audiogram into the repeater. The whole city is listening to a secret audio recording. Immediately after the end of the audio recording, the guards will capture the Lord Regent and send him to prison. Mission completed.
Kittens, aloha! ^_^
Remove the quick-dry state and roll through the gap onto small electrical boxes through the elevator shaft. You should hit the bottom of the shaft as long as you keep pressing the forward key. Once you're at the bottom, head to the hidden lost and found area you've just discovered. You will find a rune on the wall on the left, as well as a painting and a gold ingot.
Return to the dark alley on the roof between the tower and the neighboring building, but this time go through the door under the rain fence that we used to raise up. This should take you to a small landing next to Hypatia's office. Before you enter, keep in mind that you are going to be walking in a face full of blood flow, so be sure to move nice and slow or use fire to start the nests. For those making a no-kill run, don't be afraid to put some loading on the bug.
I'm slowly finishing gutting parts of Corvo Attano's adventure, and this is one of the last guides to the game. If you have already completed the game, check if you have looked into every dark corner. If you just have to try on the mask of a noble avenger, you may find this information useful. Here is how and where to find all bone amulets in the game. :)
By the grace of the Outsider, bloodsuckers don't count on your total kills, so feel free to burn them out of extreme prejudice. When you go through the door, you will see the bloodthirsty man's nest right in front of you. Take one of the liquor bottles to the right and light it up. You will find a rune nestled in the coals.
Move forward and stay left at the fork, squeezing more crib nests as needed. Around the corner, you'll see three "tanning beds" that look like steel coffins lining the wall to your right. Squeeze one on the far left and enter the room. Use another liquor bottle or firebolt and light the bloodflow socket on the ceiling and take the bone charm from the bed.
Beware spoilers!
All in the game awaits you 26 bone amulets (at least break the game from top to bottom, I didn't find any more) and, as always, they are tied to the missions during which they can be found. For convenience, I am also attaching screenshots to make it easier for you to navigate the location of each amulet (they are under spoilers). During the search, our everything is the "Heart", which will allow you to better navigate the terrain and find everything faster. I draw your attention to the fact that in missions No. 1, 8 and 9 ("Innocently convicted", "Loyalists" and " guiding beacon") there are no amulets.
Once you clear most recuperation wing, go through the door along the corridor to the right, following the corresponding quest markers. Once inside, immediately drop down the stairs on the left, break the window below and slip through. The ultimate bone charm will be waiting for you on the counter next to the audiographer.
Stock up on all three Boyle sisters and deliver your target sister to Lord Brisby and you'll receive a rune from one of the surviving Boyles. Talk to Callista in the tavern, who asks you to find Emily. You'll find her in one of several areas: in Corvo's room, at the foot of Emily's tower, near the entrance to the abandoned apartment.
EFFECTS OF AMULETS
In general, amulets are a tasty thing, and although you won’t be able to put them all on yourself (which is a pity! O_O), many of them will help you complete this or that mission even faster and better. Some amulets enhance your stealth skills, some help in combat, some are generally sort of passives. Buy an increase in the "ammunition" of amulets in time - and you will be happy. Although the location of the amulets does not change, the amulets themselves can "roam" from game to game. If in one game you took a certain amulet in some house, this does not mean that in the next game in the same place exactly such and such an amulet will be waiting for you.
Change precautions - disable watchtower
Silence all the guards patrolling on the wall and then find a means to overthrow Korvo on the Watchtower to disable it. When the Watchtower is deactivated, you have a spot from which you can observe the base below; few enemies look at the top of the Watchtower, so you are mostly safe from detection.
Enter the castle through front door or an air vent over a moat. There is also a sewer entrance, but you need to talk to the fat man on the side of the holder. Free the arc pylon and climb the stairs to the top of the station. Talk to the propaganda officer in a different way to bring down the Lord Regent. If you don't want it to end low chaos, or just going to High Chaos, you can kill the propagandist after you talk to him.
For convenience, here are the effects of all the amulets in the game:
- Acrobat: You climb walls a little faster.
- Albino: white rats come across to you a little more often.
- Fast Fighter: Weapon in hand does not slow you down.
- bull blood: Increases your mana.
- Vortex I: You wield your blade slightly faster.
- Whirlwind II: You are slightly faster with your blade.
Edit Advanced: kill the inquisitive
Please note that completing this "side mission" will result in the " clean hands' as it requires you to kill your target without exception. Be also warned that there will be a wolfhound nearby. The tormentor cannot be dazed or sleepy; he uses outsider magic to pull you close to hit you.
If you don't intend to kill the tormentor, you can sneak after your sleep by dropping your dog, grab the rune, and leave. The overseer body is the divisions inside the panic room. Save your game before logging in. This number has nothing useful, and if you were to take care of Burrows, you would just want to leave. Meet Sam at the bottom of the pond to complete your mission.
- Retribution: Damage taken increases the amount of adrenaline.
- Endurance I: Potions restore health slightly better.
- Endurance II: Potions restore health even better.
- Undertaker: When carrying corpses, you move slightly faster.
- Spirituality I: Potions are slightly better at regenerating mana.
- Spirituality II: Potions are much better at regenerating mana.
- living water : Water from fountains restores a small amount of health.
- The smell of a rat: Rats attack only when you are very close.
- invited guest: you can move into white rat for a longer time.
- Healthy Appetite I: Food restores slightly more health.
- Healthy Appetite II: Food restores health quite well.
- Plague Immunity: Weepers deal slightly less damage.
- spirit well: You regenerate mana slightly faster.
- Thrower: you throw things a little faster.
- Meteor: Kill while falling restores some mana
- Unrelenting Rage: It takes less time to prepare a new adrenaline attack.
- Agile Shadow: You move faster while in stealth mode.
- blurry purpose I: Enemies sometimes miss when firing pistols.
- Blurred Target II: Enemies miss more often when firing pistols.
- Holy water: Tap water restores some mana.
- Strong arms : You choke enemies faster.
- broken clock: Enemy grenades explode with a delay.
- Junkman: You find more ammo.
- Thick skin: Your health is slightly increased.
- Rodent killer: Killing rats raises adrenaline.
- Fortune Smile I: Very rarely, potions fully restore mana.
- Fortune's Smile II: Rarely, potions fully restore mana.
- Reinforced bolts: Bolts are less likely to break on impact.
- plague gift: Damage dealt by Weepers restores some mana.
As you can see, some of them are better for stealth, some are better for combat, and some are useful in any situation. And let's go look for them!
MISSION №2. HIGH OVERSEE
Guide to Finding Bone Amulets in Dishonored
 Guide to Finding Bone Amulets in Dishonored
The number of amulets - 5.
Amulet #01.
Location: wine district bridge
How to get a: the first amulet in the mission is easy enough to get. When you find the first wall of light, turn your back on it and follow the tracks to the very end of the bridge. Using Transference, go around the locked door (left or right, at your discretion) and take the amulet.
Amulet #02.
Location: Griff's house
How to get a: another very easy to obtain amulet. After passing the first wall of light, turn right into the alley. There you will come face to face with a bandit who is guarding the boarded-up entrance. Deal with the bastard and break the boards to free Griff and get inside. On the second floor of the house, the second amulet is waiting for you.
Amulet #03.
Location: Dunwall distillery
How to get a: if you are on the advice of a kind grandmother Staraya Rags decided to take a walk to the gang's lair from Bottle Street, then you will be very on the way with this amulet. Finding him is easy, harder to get into the farthest corner of the distillery without raising a commotion among the bandits (if you go in the ghost style). If not, we sweep away everyone in our path and go to the vault. The amulet is on the beam at the very top. Use the Transference and the barrels on the side as steps to get to it.
Amulet #04.
Location:
How to get a: to search for the next amulet, we go to the backyard (there we will meet with Samuel at the end). We teleport from the opening to the roof and go straight, to the very pipes, which are suitable for a small building. If you climb onto its roof, and from there get to the window, boarded up, you can get inside and pick up another amulet.
Amulet #05.
Location: office of the supreme warden
How to get a: the last amulet in the mission will also be waiting for you on backyard, only this time from the opening you will need to take a left and go all the way. I would advise you to move by rooftops, because in order to get into the building with the amulet, you will need an open window on the second floor. Climb down the chains and take the amulet clamped in a vise on the table. Beware of rats, there are a lot of them!
MISSION №3. HOUSE OF PLEASURES
Guide to Finding Bone Amulets in Dishonored
 Guide to Finding Bone Amulets in Dishonored
The number of amulets - 5.
Amulet #06.
Location: house in the Wine Quarter
How to get a: we will find the first amulet in the mission along the way. Go to the house where you saved Griff from the bandits. This time there will be assassins on duty. Eliminate them in any way at your discretion and climb into the house, which is located on the left in front, if you stand with your back to the entrance to Griff's dwelling. To get into the house, climb up the pipe and climb onto the balcony. In a room boarded up with boards, an amulet and a mourner will be waiting for you.
Amulet #07.
Location: house in the Wine Quarter
How to get a: the second amulet is not very far from the first. We climb out onto the roof of a neighboring building and next to it we see an alley along which mourners roam. We deal with them, go down and go into the alley to the right. There is an amulet in the boarded-up room, and our beloved Old Rag wanders a little way off.
Amulet #08.
Location: Dunwall distillery
How to get a: having gone to visit Slackjaw, pay attention to the locked cage to the left of the entrance. Infected bandits are still languishing there (unless, of course, you made a gift to Rags and infected the gang's elixir during past mission). The cage is locked, it can be obtained in the room on the right after the main entrance. After opening the door, deal with the bandits and get your amulet.
Amulet #09.
Location: hotel "Captain's bridge"
How to get a: to get to this amulet, complete Slackjaw's quests and find out the fate of Crowley, his informant (you can do this in Dr. Galvani's office). As a thank you, the bandit will give you the key to the abandoned hotel, which will allow you to sneak into the Golden Cat. On the ground floor, next to the mattress, there will be the desired amulet.
Amulet #10.
Location:"Golden Cat"
How to get a: the last amulet in the mission is in a locked room, so I advise you to first look into the office of the dearest Madame Prudentia to get hold of universal key from Golden Cat. Once the key is in your hands, go upstairs to the locked room and take the amulet from the picture frame.
MISSION №4. ROYAL DOCTOR
Guide to Finding Bone Amulets in Dishonored
 Guide to Finding Bone Amulets in Dishonored
The number of amulets - 3.
Amulet #11.
Location: south gate house
How to get a: to find the first amulet, you have to sweat a little. Do not leave the starting location, moving to Drobridge during the mission, this amulet cannot be taken there. Go down the bars down to the water and reach the console with a switch lever. He will lower the bridge and you can use it to get to the pipes and from there to the balcony on the top floor. In the room with the weeper, an amulet will be waiting for you. The control panel can be reached in different ways, for example, turn off the main street to the right and go down the stairs to the chains. Next is a matter of technology. Screenshots will guide you.
Guide to Finding Bone Amulets in Dishonored
 Guide to Finding Bone Amulets in Dishonored
Guide to Finding Bone Amulets in Dishonored
 Guide to Finding Bone Amulets in Dishonored
Guide to Finding Bone Amulets in Dishonored
 Guide to Finding Bone Amulets in Dishonored
Amulet #12.
Location: house at Midrow substation
How to get a: before reaching a couple of steps to the north side of the Sokolov house, look to the left, there will be a house. The door is locked, of course, but we don't actually use doors, do we? We use Transference to get to the balcony and go downstairs for our amulet. Nothing complicated, and it’s convenient that you don’t have to climb the horns behind him somewhere.
Amulet #13.
Location: house on the north side
How to get a: this amulet is also easy to get. Once you're on the North Side, look to your left. There will be a house, invitingly winking at you with an empty window opening. We climb into the window and .. no, we don’t take the amulet yet: the doorway is littered with all kinds of garbage. So first we have to get to the roof and use Transfer to get to the balcony. And now we take the amulet. Hurray, all three are in our hands!
Guide to Finding Bone Amulets in Dishonored
 Guide to Finding Bone Amulets in Dishonored
Guide to Finding Bone Amulets in Dishonored
 Guide to Finding Bone Amulets in Dishonored
Guide to Finding Bone Amulets in Dishonored
 Guide to Finding Bone Amulets in Dishonored
MISSION №5. LADY BOYLE'S LAST RECEPTION
Guide to Finding Bone Amulets in Dishonored
 Guide to Finding Bone Amulets in Dishonored
The number of amulets - 3.
Amulet #14.
Location: pub "Pesya yama"
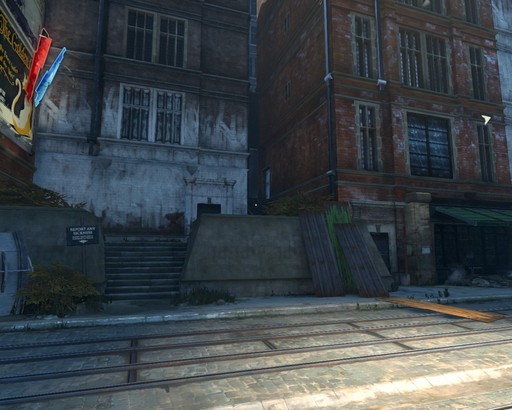
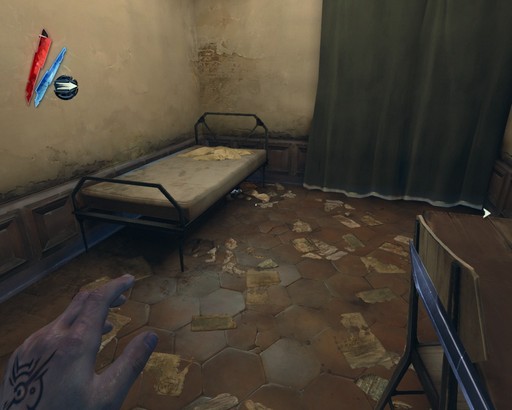
How to get a: immediately after the boat with Sokolov's carcass moored to the shore, find the key to the abandoned dwelling. It will lie in a room on the second floor of the Dog Pit Pub, where there are several bunk beds. The key is on the floor under one of them. After that, exit the pub, climb the stone stairs and climb into the corner, to the door. Behind her in one of the rooms, also under the bed is your amulet.
Guide to Finding Bone Amulets in Dishonored
 Guide to Finding Bone Amulets in Dishonored
Guide to Finding Bone Amulets in Dishonored
 Guide to Finding Bone Amulets in Dishonored
Guide to Finding Bone Amulets in Dishonored
 Guide to Finding Bone Amulets in Dishonored
Amulet #15.
Location: red stone house
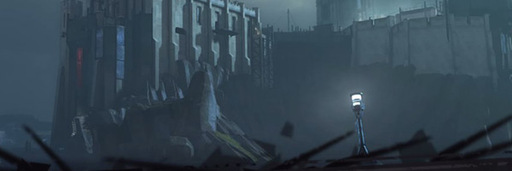
How to get a: the second amulet is in the house across the bridge from the Boyle estate. It is still illuminated by spotlights. Enter the doorway, climb to the very top and deal with the mourners. First, you will see the sanctuary of the Alien with a rune, and a little further, the actual bone amulet will be waiting for you.
Amulet #16.
Location: house next to the Boyle estate
How to get a: the third amulet is also easy to find. Cross the narrow bridge that leads to the other side of the Boyle estate, and there will be a house to the right of it. Climb to the very top, and in one of the rooms (it's hard to get lost there, honestly) take the amulet. Beware of weepers, there are plenty of them!
MISSION №6. RETURN TO THE TOWER
Guide to Finding Bone Amulets in Dishonored
 Guide to Finding Bone Amulets in Dishonored
The number of amulets - 2.
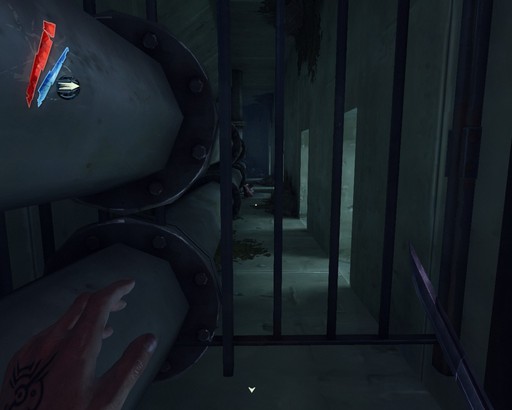
Amulet #17.
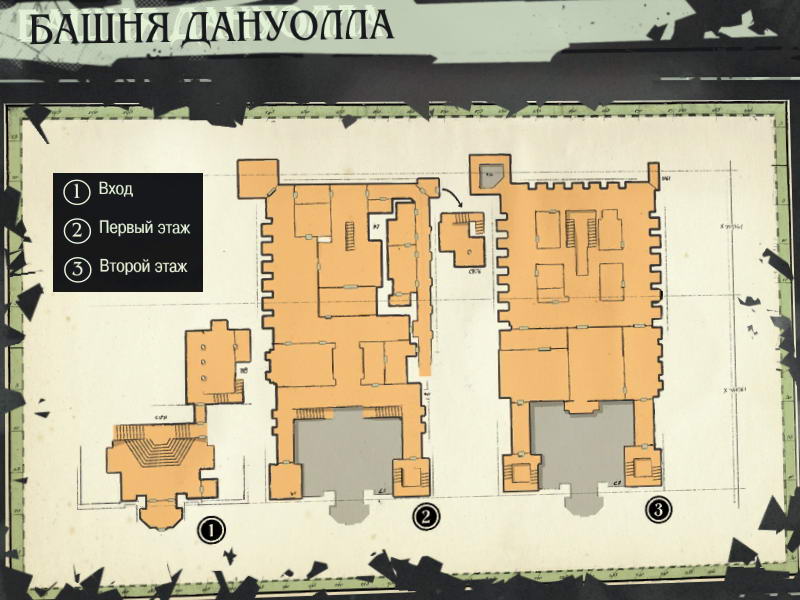
Location: entrance to the tower
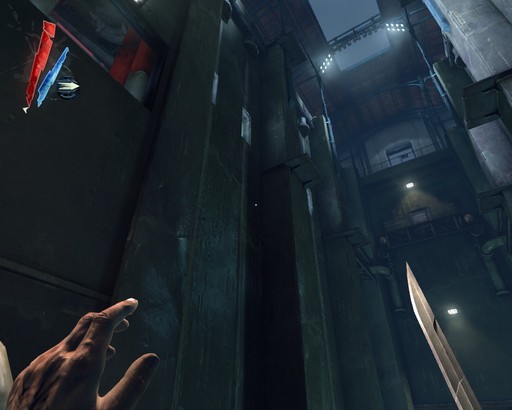
How to get a: the first amulet is quite difficult to miss. When you swim through the entrance to the Tower and climb the ledges to the very top, you will find yourself at the grate. It is she who separates you from the amulet. Pass two mechanisms and go around the location in a circle, use Transference and take your reward. Everything is very simple.
Guide to Finding Bone Amulets in Dishonored
 Guide to Finding Bone Amulets in Dishonored
Guide to Finding Bone Amulets in Dishonored
 Guide to Finding Bone Amulets in Dishonored
Guide to Finding Bone Amulets in Dishonored
 Guide to Finding Bone Amulets in Dishonored
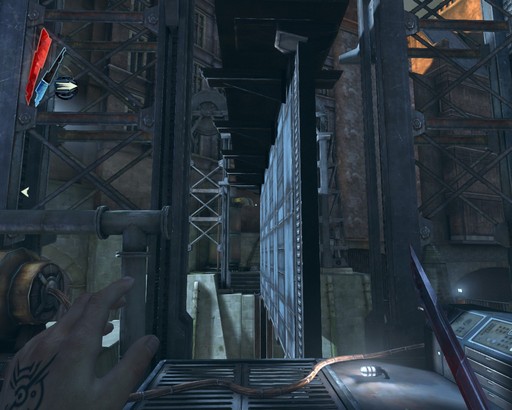
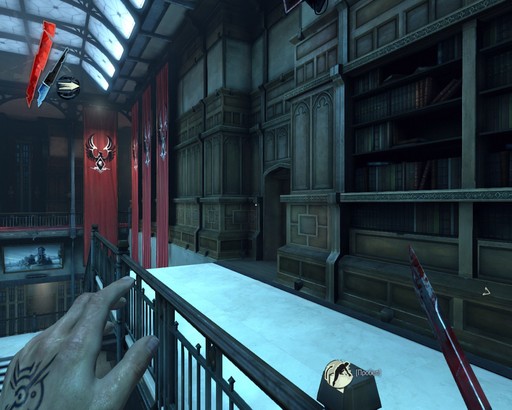
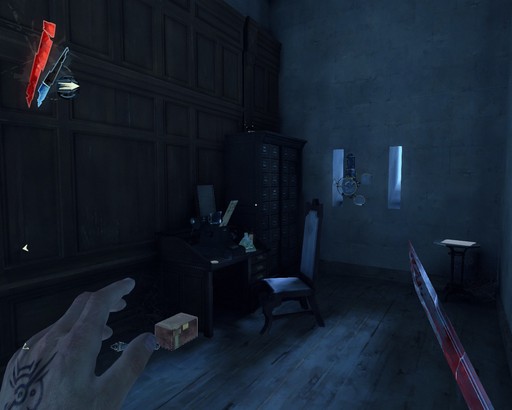
Amulet #18.
Location: cache in the tower
How to get a: to get hold of the second and last amulet in this mission, you will have to be smart. Climb up the second, less grand staircase to the top and go through the corridors to the corner fireplace. Judging by the joyful beat of the "Heart", the rune should be somewhere nearby. But it was not there: attempts to go ahead will lead nowhere. Therefore, we look up and to the right and turn the lamp-switch. She will open a hole in the fireplace to a secret room. In it, in addition to the amulet, there are supplies and a record with a short speech of the late empress.
Guide to Finding Bone Amulets in Dishonored
 Guide to Finding Bone Amulets in Dishonored
Guide to Finding Bone Amulets in Dishonored
 Guide to Finding Bone Amulets in Dishonored
Guide to Finding Bone Amulets in Dishonored
 Guide to Finding Bone Amulets in Dishonored
MISSION №7. FLOODED QUARTER
Guide to Finding Bone Amulets in Dishonored
 Guide to Finding Bone Amulets in Dishonored
The number of amulets - 8.
Amulet #19.
Location: house next to Greaves' dairy
How to get a: Once you start the mission and end up at the Rudshore Pier, move along the quest to get your equipment. Considering how much benevolent fauna surrounds you, I would advise you to move on the roofs. Teleport to the top of the house, which is located next to the fat factory (at the bottom it is surrounded by mourners from all sides) and carefully enter the opening. The amulet is guarded by two more patients, so be careful: you don’t have equipment, there’s nothing special to be treated in which case.


