Ancient gods of the world list. Ancient gods of ancient Greece briefly
Sharing with your finds. All or almost all of us have to do crafts with children for kindergarten or school... You will also find fantasies here for home creativity with kids.
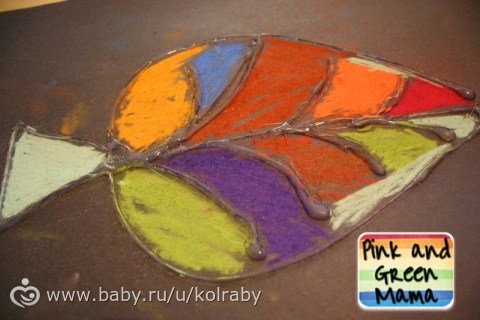
Let's start with the trees...


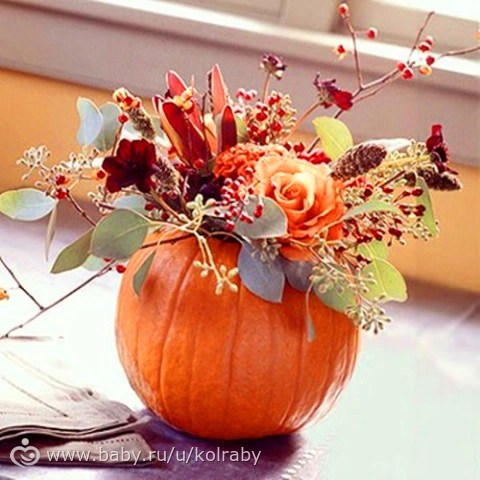
And now - pumpkins...


You don't have to do everything for a specific master class... And strictly adhere to the proposed topic. Can just take a craft idea and remake it in your own way.
Fantasies about candles...


Accessories of the “Queen of Autumn”…


Papier-mâché... And not only...


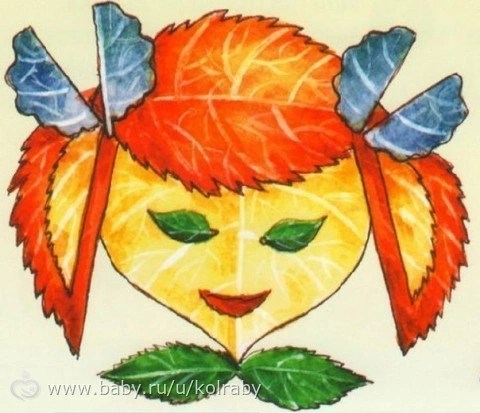
Well I didn’t put the owls first again. They are always the first and most important for us...


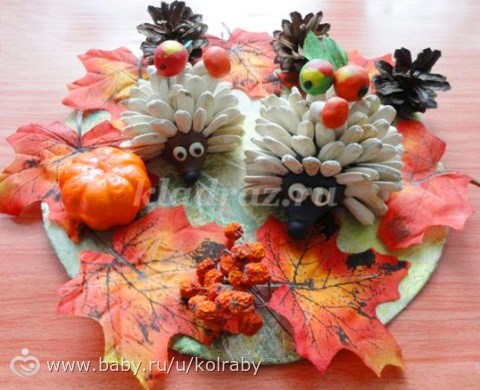
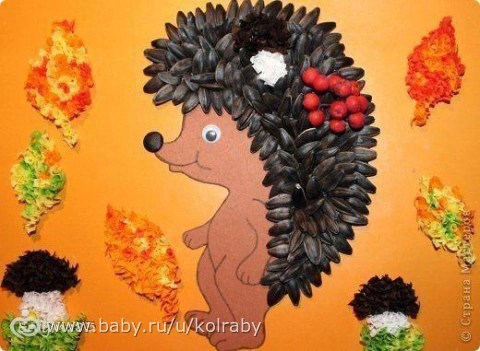
There are, in addition to owls, other living creatures…


And again - improvised material. Not only the one found in the forest... But also the “home” one... For example, pistachio shells...


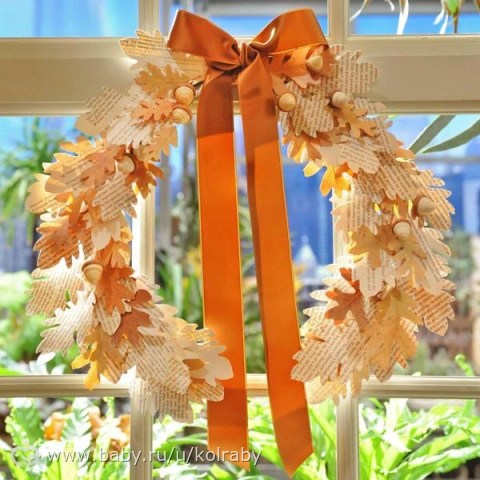
AND door (wall) wreaths... are good not only at New Year and Christmas... In the fall they especially cozy and bright it turns out...


And again pumpkins... Some people have a lot of them in their dachas! I’m not a dacha lover (no, no): my mother just hands me buckets of vegetables. But my godmother gave me a pumpkin last year. Ahhhh... Maybe I'm Cinderella?


If you don't understand how cover with leaves or dough bowl from below, to get such beauty, watch the master classes...


Many people make baskets now. A very popular craft. On topic "Gifts of Autumn"... Well, the baskets really turn out very colorful and juicy...


And again leaves... And again owls... And a lot of art...


In our kindergarten, Alice’s group is very talented, kind and hardworking teachers- Olga Grigorievna and Anna Sergeevna. They love children. And they adore them make all sorts of things in the educational process... Or draw...


Us crafts for children in kindergarten teachers left on a large panel- attached to paper clips that hang on fishing lines... Now I’ll find a post in a magazine when we made such a panel (with owls, of course) for crafts...


Some parents ignore creative activities... They say that paints are a lot of dirt and stains - you can only get by with pencils or felt-tip pens... And all that comes out is a mess... And the child, they say, doesn’t understand the plasticine - he rejects it... Start small- just give the child the materials. A couple of lessons... Then again... And then start gradually advise and help... To encourage creativity, to create... I also don’t really like dolls and LEGOs covered with plasticine... But accuracy, diligence and imagination... they won’t come from anywhere from a child if you don’t work. Daily.


Of course, there is always not enough time. Of course, there is a lot of work and household chores. But the child is delighted that his autumn work is also on display in a kindergarten or school. This - a source of pride yourself and your family...
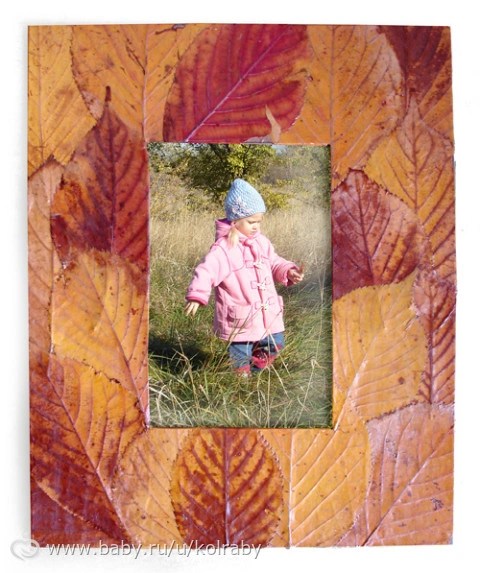


Maybe this year... Maybe next... Your work will be recognized as the best at the exhibition. Even a prize. It will be a wonderful day. In the meantime, let family evenings be warmed by autumn candles, and photo frames decorated with leaves or acorns adorn the shelves...
By the way, my friend and I once made of papier-mâché just made giant mushrooms... All the children made them as tall as a palm... And here we have... Giants. Mutants...)))


Who hasn't read mine yet? 100 ideas for autumn, be sure to read. And apply - partially...
We a lot of things have already been used and done with Alisa and Shura- I’ll tell you in other posts...
And I’ll show you not today or tomorrow... autumn video...And pictures. According to last fall. Ours is so beautiful There was a family shoot. It’s just so complicated for a video combination of video and photo...So I'm waiting for Shura will finish installation. For now he has a lot of work to do.
P.S. Yes, I show you very few personal and family photos. Otherwise you will get tired of me...


Thinking about purchasing office supplies? So, it’s time for a useful and very cute craft for school -
cloth in the form of a funny kitten.
To make it you will need:
- pieces of sufficiently dense material that does not fray at the edges different colors. Older children and adults can easily handle felt or drape, which will make a well-designed, durable craft. It's better for kids to take various options cotton fabrics;
- short zipper (its length should be no shorter than the length of a regular pencil or felt-tip pen);
- sewing thread and needle;
- sharp tailor's scissors;
- safety pins;
- well-sharpened colored crayons;
- cardboard and pencil.

From cardboard you will need to cut out the pattern pieces shown in the figure. Two parts will be unpaired - an oval bottom and a triangular sidewall. The remaining parts (ears and sides) will be paired; they can be immediately divided into pieces of material folded in half. Having fixed all the details with safety pins, we carefully cut them out.

During the cutting process, do not forget to leave a small allowance at the edge - for the seam. To make it clear where the allowance is and where the detail is, we trace the pattern along the contour with chalk.

We take in our hands the two largest parts and the zipper. We sew it between the parts.

The more accurately the fastener is sewn, the better the finished product will look.

Take two smaller triangular parts.

If their edges are crumbling, you can stitch the parts along the contour drawn with chalk, or overlay them. To these parts we sew parts of the same shape, but of a different color. We proceed as usual: we put the seam on the wrong side, and then turn the product inside out.


We sew the finished elements to the base - on both sides of the beginning of the zipper. We only sew the seam along the bottom edge. Now let’s try on another large part to the base - the sidewall.

Before sewing it on, we straighten the edge.

From the inside out, carefully attach the side panel to it.

Turn it inside out. Our craft for schoolchildren takes on the shape of a cat!

Sew the bottom on the wrong side. At the same time, if the zipper turns out to be a little long, trim it and stitch the cut edge well so that it does not unravel. You can carefully overcast the seams from the inside out to make the product last longer.

Turn it inside out again. The cat is almost ready!

All that remains is to prepare the button eyes, felt nose and black marker.

Sew on the eyes and nose, and draw a mustache with a marker.


Our craft for school is made with our own hands!
Autumn time is the best best time in order to prepare natural material from which various crafts will be created in the future. Many schools celebrate autumn day today. And on this holiday it is customary to make various crafts from natural materials. Indeed, crafts for 1st grade in schools at the beginning of autumn are made mainly from natural materials. Therefore, in our selection of crafts for 1st grade you can also find such wonderful crafts made from materials that nature has generously rewarded us with. In addition, here you will see other options for crafts that you will definitely want to make.
Crafts for 1st grade from natural materials
Look at what a wonderful composition can be made from the materials that lie under our feet in the fall. And for this composition you will have to collect acorns. You will also need PVA glue and a sheet of cardboard, from which you must cut out the shape of a regular leaf.

Probably all 1st grade students are familiar with the popular cartoon - Smeshariki. So, you can make these heroes from natural materials in a creativity lesson at school. To create this craft, you only need to prepare vegetables and plasticine. You may also need felt-tip pens with which you will decorate the characters. Everything looks very funny. Isn't it true?

Crafts from handy materials
In this article you will find crafts for elementary school students. You can make all these crafts at school in class or at home, for example, for a school exhibition. We all have a lot of unnecessary things in our home. And if you have old glass jars lying around at home, we suggest making them a little brighter.
So, you should prepare:
- a clean glass jar,
- acrylic paints,
- flowers for decoration.
Making such a craft is very simple. To do this, you just need to paint the jar with acrylic paints. And as soon as the paint dries, you need to write on it using a marker. That's it, the wonderful vase is ready. All you have to do is insert flowers into it.

If you have matches at home, you can make such a picture out of them. Here you will need glue and a sheet of cardboard. Let your imagination run wild and see what you can come up with.


Crafts made from colored paper
You can make many crafts from colored paper. And therefore, such material is used quite often in classes with schoolchildren. You can make such bright and interesting things from paper. And the diagram will tell you how to make them.


Indian.
To make such an Indian you should prepare:
- colored paper: red, yellow and orange;
- toilet paper roll;
- scissors;
- glue;
- a couple of buttons;
- marker;
- a couple of large buttons.

Work progress:
- First, you should glue a couple of buttons onto a toilet paper roll. As a result, you get eyes.
- From orange paper you need to cut out a triangle, which is instead of a beak. And from red paper you need to cut out a squiggle, which is glued under the beak.
- Now place your palm and circle it. After which you should cut it out. This palm should be used as a template. And it’s worth cutting out several of these palms. There should be approximately 6 of them.
- Now we glue the palms behind the sleeves. Moreover, you need to glue it in 2 layers in order to get feathers.
- Finally, we glue 2 large buttons to the bottom of the sleeve, which will be the legs of the craft.
Hand toy - a cheerful octopus.
This craft is very easy to make. To work you need to prepare:
- scissors and pencil;
- glue and colored paper.
Work progress:
- First, you should place your palm on a piece of paper. Then you should outline it with a simple pencil. Moreover, the fingers are the legs of an octopus.
- Now, using colored paper, you should make the face of an octopus.
- Then you should cut out a skirt for the octopus girl from paper.

That's it, the fun craft is ready.
In conclusion
Now you have learned about what crafts you can make for school in 1st grade. It is worth saying that this is just part of the crafts. And you can supplement these ideas with your creative thinking and imagination.


