The concept of the educational subject “drawing. Drawing lesson "introduction"
Approved
Ministry of Education of the Republic of Belarus
29.05.2009 № 675
CONCEPT
EDUCATIONAL SUBJECT "DRAWING"
General provisions
The graphic language is acquiring great importance in connection with the implementation of state economic programs in the country, the development of science, high technology, culture, etc. As a result, there is a need to prepare schoolchildren to master the elements of the graphic language, introducing them to the graphic culture of society as the totality of human achievements in the field of creation and the use of graphic information tools.
Drawing in grade IX should be considered as a general discipline. It should systematize the students’ knowledge about graphic images, acquired in the lessons of labor training, mathematics, fine arts and other items.
At the same time, it is necessary to show the practical orientation of the material being studied in the school, everyday and industrial spheres. To establish interdisciplinary connections in lessons when presenting material and in extracurricular activities, examples from other academic disciplines should be used as much as possible, illustrating the graphic display of information about the subjects and phenomena discussed in them.
In elective classes, it is possible to in-depth study of “Drawing” at the second stage of general secondary education, as well as to continue studying of this subject at the third stage.
^ The purpose and objectives of the academic subject “Drawing”
The graphic component of education should ensure that students develop such a set of rational techniques for performing and reading various images that would allow them, to one degree or another, to navigate the large volume of modern graphic information tools. This set should be the norm, the “standard” of a student’s graphic education.
Basic purpose the educational subject "Drawing" is the formation of techniques for reading and performing various images that allow one to navigate modern world graphic information means, join the graphic culture, master the graphic language as a means of communication between people of various professions.
Realization of this goal involves solving tasks:
Formation of a system of knowledge among students about graphic images, types of graphic information, standards of the Unified System design documentation(ESKD);
Students mastering techniques for analyzing graphic information about products, reading in in the prescribed manner such information;
Development of spatial concepts, aesthetic taste in students, education positive qualities personalities;
Familiarization with computer technologies, the use of computers to obtain graphic documents;
Preparing students to apply acquired knowledge, skills and abilities in school and everyday practice, for engineering and technological activities, design.
^ Contents of education in the subject "Drawing"
Types of graphic images. Drawing in rectangular projections, sketch, technical drawing, view, section, section, axonometric projection, diagram, forms of information presentation in applied graphics.
^ Graphic systems and image acquisition tools. Graphic methods of displaying information about objects, including through projection. Visual information systems, graphic language tools (visual, symbolic). The order of image formation (manual, computer). Rules for the implementation of design documentation according to ESKD (graphic and text). Drawings for various purposes, techniques for reading them.
Shaping. Objects of graphic images, their spatial characteristics. Surfaces and bodies, geometric elements of shape, its analysis, transformation.
^ Checking your graphics level
Checking the graphic readiness of students is carried out using current and thematic control. General requirements to the level of preparation of graduates are formulated in the curriculum of the subject.
5. Composition and structure of the educational and methodological complex
The educational and methodological complex on the subject “Drawing” for general education institutions consists of:
From the curriculum;
Textbook, teaching aid;
Teaching aids;
Tables;
Workbooks;
Didactic materials;
Audiovisual and electronic learning tools.
Branch of MBOU secondary school in the village of Terbuny in the village of Ivanovka
Presentation for a drawing lesson
"CURRICULUM SUBJECT "DRAWING"
Prepared
teacher of fine arts and drawing
Kuznetsova Tatyana Ivanovna
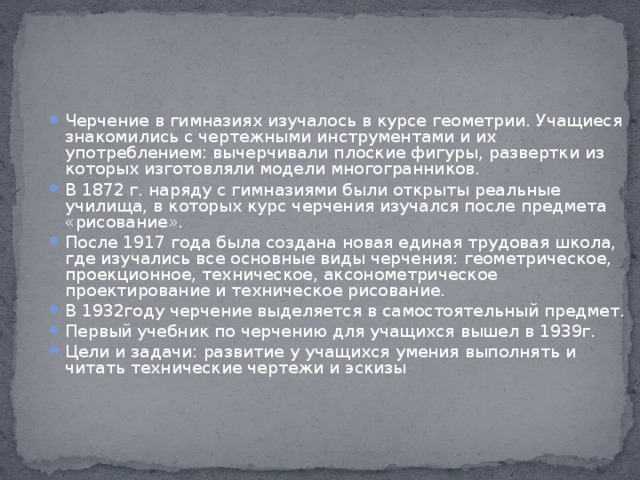
- Drawing in gymnasiums was studied in the geometry course. Students became familiar with drawing tools and their use: they drew flat figures, the developments from which were used to make models of polyhedra.
- In 1872, along with gymnasiums, real schools were opened, in which the course of drawing was studied after the subject of “drawing”.
- After 1917, a new unified labor school was created, where all the main types of drawing were studied: geometric, projection, technical, axonometric design and technical drawing.
- In 1932, drawing became an independent subject.
- The first textbook on drawing for students was published in 1939.
- Goals and objectives: developing students’ ability to perform and read technical drawings and sketches
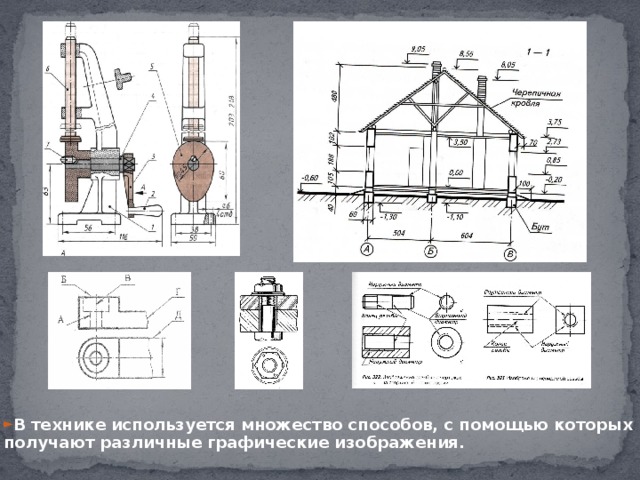
receive various graphic images.
A drawing is a kind of graphic language.
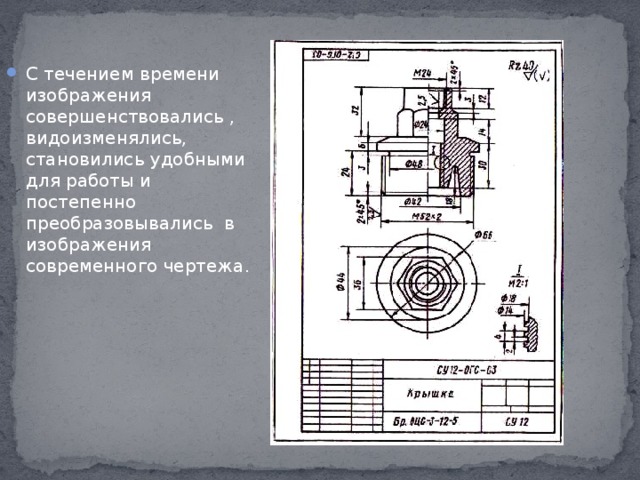
Drawing is the main document that contains information about the form,
product dimensions, material.
A drawing is a graphical means of transmitting information, it is
a concise means of expressing technical thought
Firearm drawing
Project of a single-arch bridge across the Neva in 1776.
Appearance of Pereslavskaya
17th century fortress
Drawing is one of the means of studying subjects
the world around us. He has come a long way in development. Gone
centuries before graphic images became
modern look.
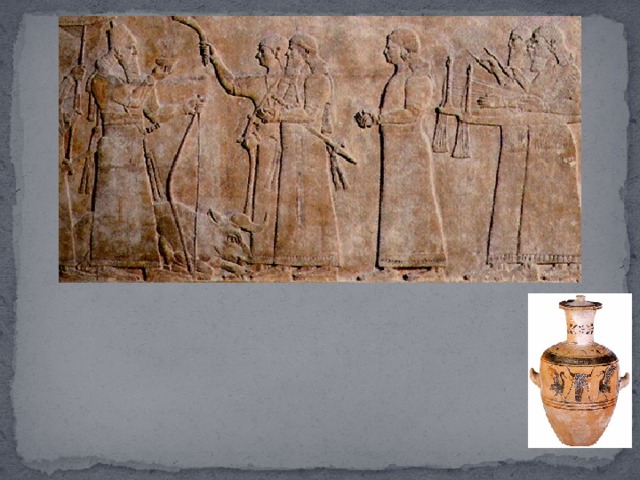
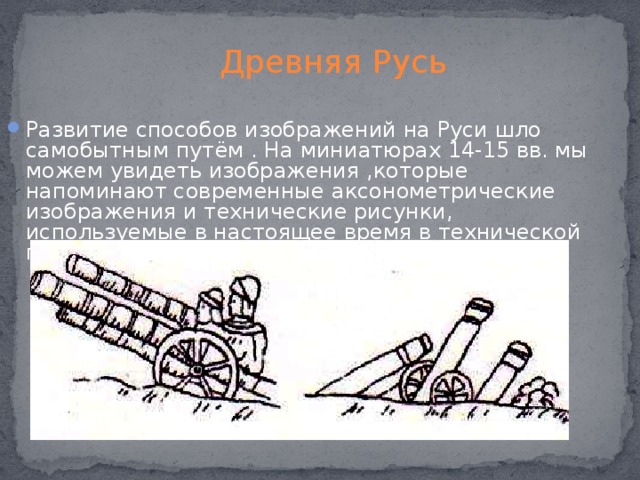
- The development of image methods in Rus' followed an original path. On miniatures of the 14th-15th centuries. we can see images that are reminiscent of modern axonometric images and technical drawings currently used in technical graphics.
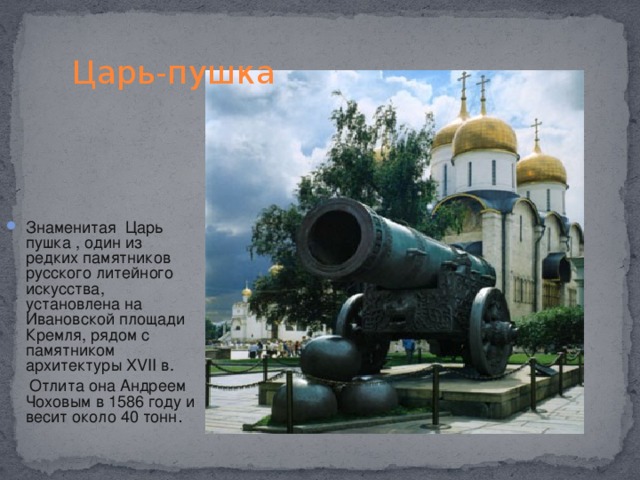
Tsar Cannon
- The famous Tsar Cannon, one of the rare monuments of Russian foundry art, is installed on Ivanovo Square of the Kremlin, next to the monument architecture XVII V.
It was cast by Andrei Chokhov in 1586 and weighs about 40 tons.
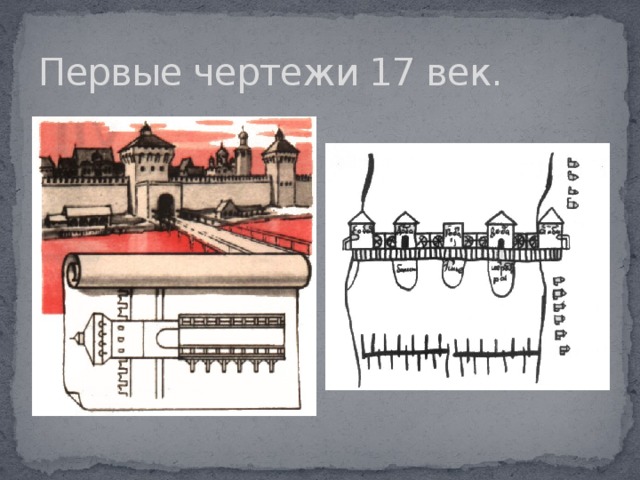
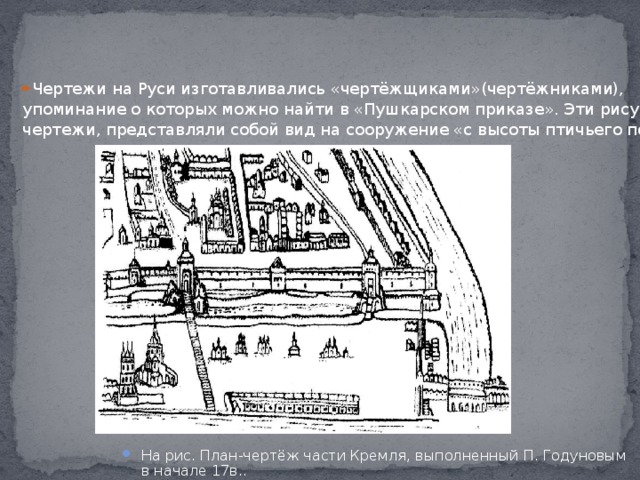
- Drawings in Rus' were made by “draftsmen” (draftsmen),
a mention of which can be found in the “Pushkar Order”. These drawings are
the drawings were a bird's-eye view of the structure.
- In Fig. Plan-drawing of part of the Kremlin, made by P. Godunov at the beginning of the 17th century.
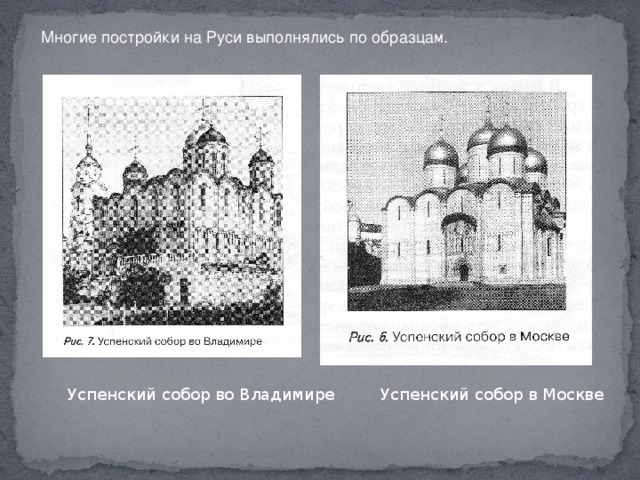
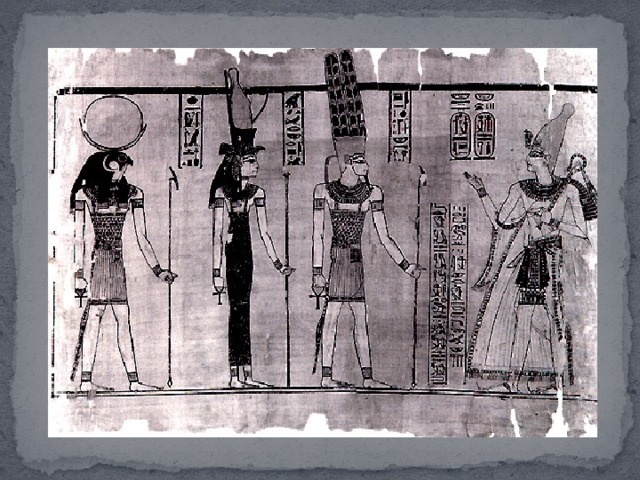
Many buildings in Rus' were made according to samples.
Assumption Cathedral in Vladimir
Assumption Cathedral in Moscow

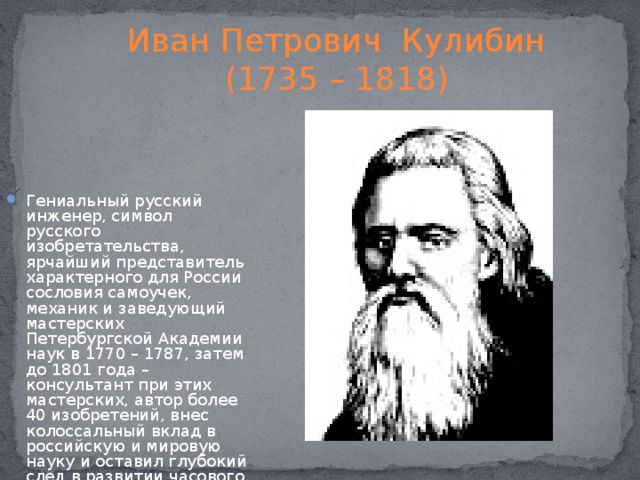
Ivan Petrovich Kulibin
- A brilliant Russian engineer, a symbol of Russian invention, the brightest representative of the self-taught class characteristic of Russia, a mechanic and head of the workshops of the St. Petersburg Academy of Sciences in 1770 - 1787, then until 1801 - a consultant at these workshops, the author of more than 40 inventions, made a colossal contribution to the Russian and world science and left a deep mark on the development of watchmaking.
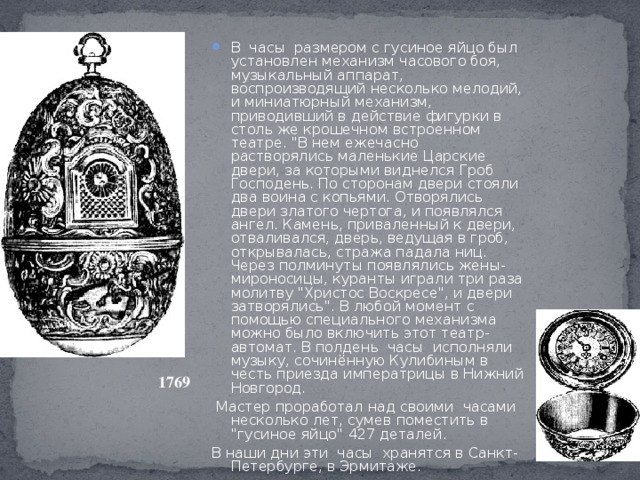
- The clock, about the size of a goose egg, contained a chiming mechanism, a musical apparatus that played several melodies, and a miniature mechanism that powered the figures in an equally tiny built-in theater. "Every hour the small Royal doors opened in it, behind which the Holy Sepulcher was visible. On the sides of the door stood two warriors with spears. The doors of the golden palace opened, and an angel appeared. The stone rolled to the door fell off, the door leading to the tomb opened, the guards fell on her face. Half a minute later the myrrh-bearing women appeared, the chimes played the prayer “Christ is Risen” three times, and the doors were closed.” At any moment, using a special mechanism, this automatic theater could be turned on. At noon, the clock played music composed by Kulibin in honor of the Empress’s arrival in Nizhny Novgorod.
The master worked on his watch for several years, managing to fit 427 parts into the “goose egg”.
These days, this watch is kept in St. Petersburg, in the Hermitage.

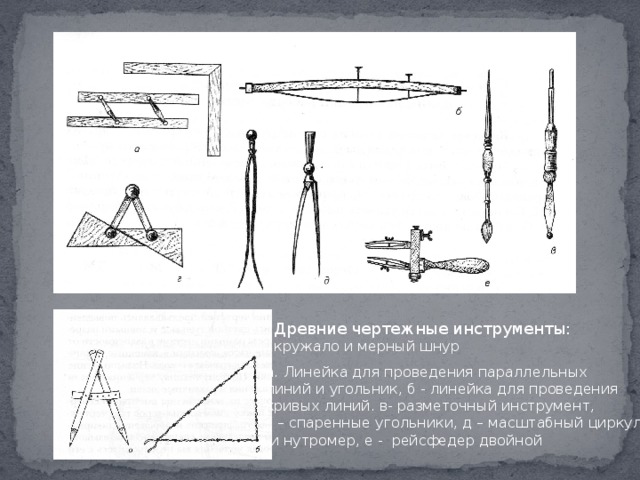
Ancient drawing tools:
circle and measuring cord
A. Ruler for drawing parallel
lines and a square, b - a ruler for drawing
curved lines. c - marking tool,
d – paired squares, d – scale compass
and bore gauge, e - double drawing gauge
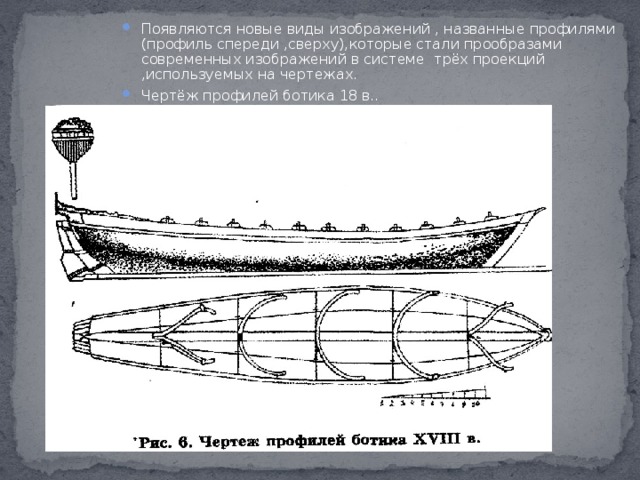
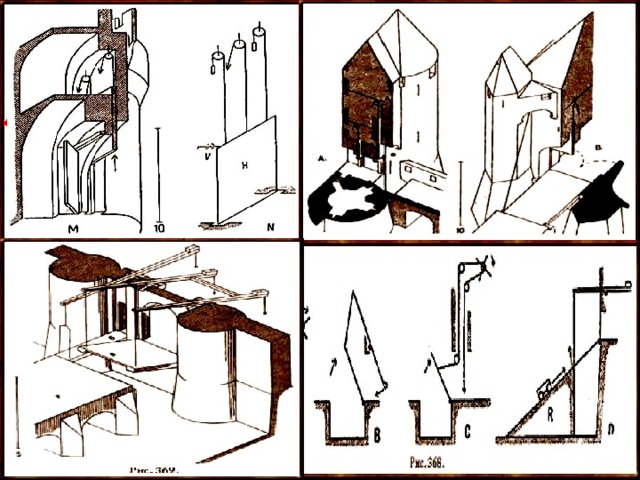
- New types of images appear, called profiles (profile in front, from above), which became the prototypes of modern images in the system of three projections used in drawings.
- Drawing of the profiles of an 18th century boat..
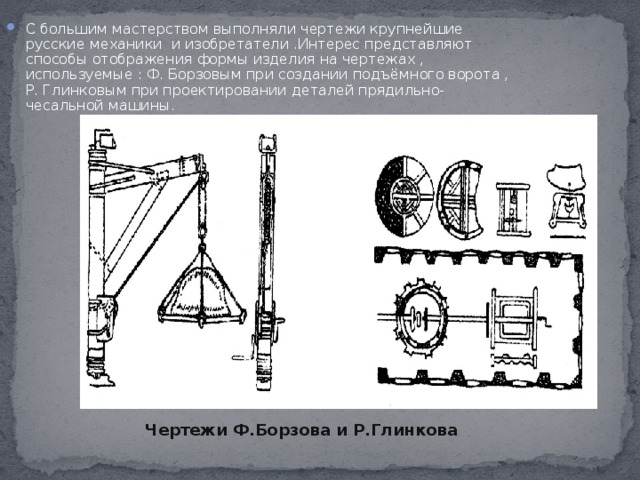
Drawings by F. Borzov and R. Glinkov
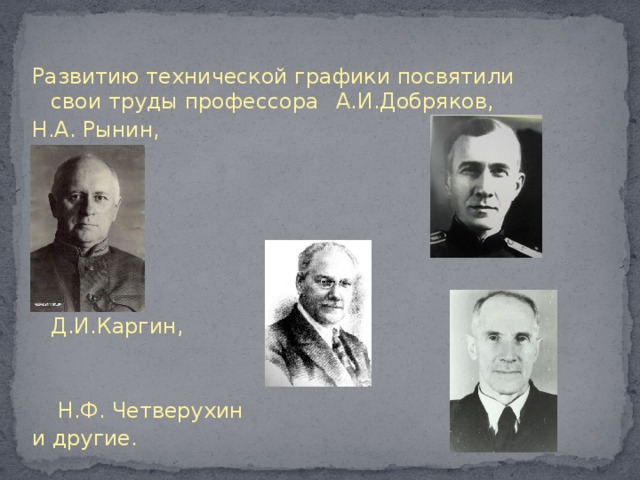
Development technical graphics Professor A.I. Dobryakov dedicated his works,
N.A. Rynin,
D.I.Kargin,
N.F. Chetverukhin
and others.
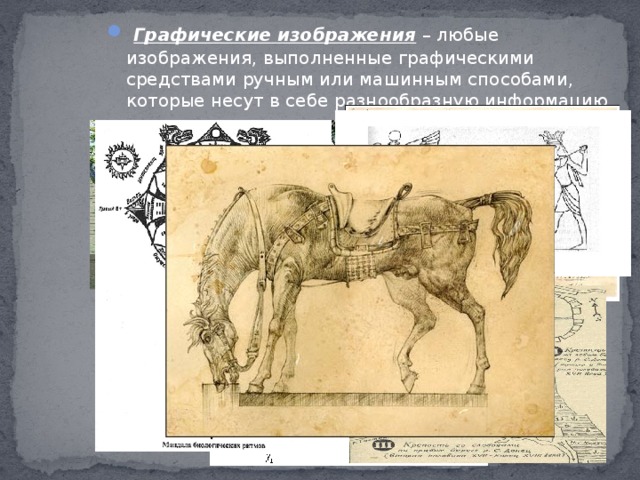
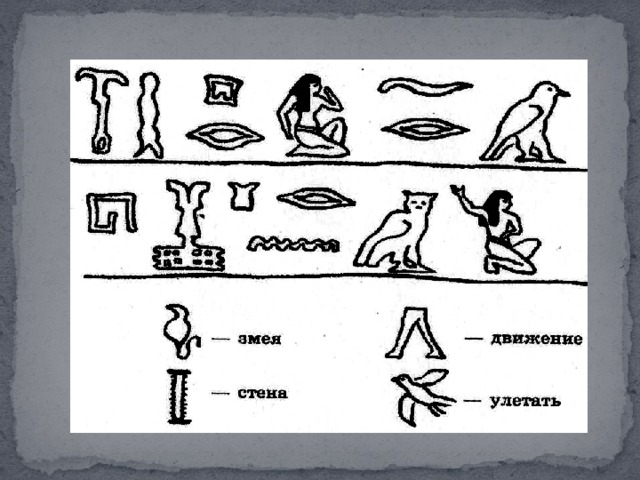
- – any images made by graphic means, manually or by machine, that carry a variety of information.
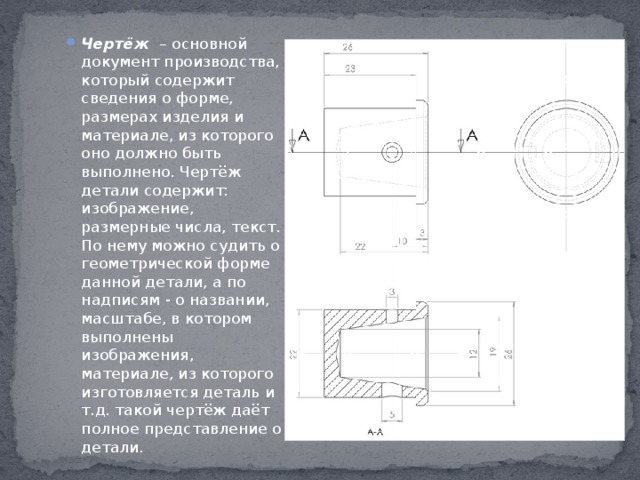
- Drawing – the main production document, which contains information about the shape, dimensions of the product and the material from which it should be made. The part drawing contains: image, dimensional numbers, text. From it you can judge the geometric shape of a given part, and from the inscriptions - about the name, the scale in which the images are made, the material from which the part is made, etc. such a drawing gives a complete picture of the part.
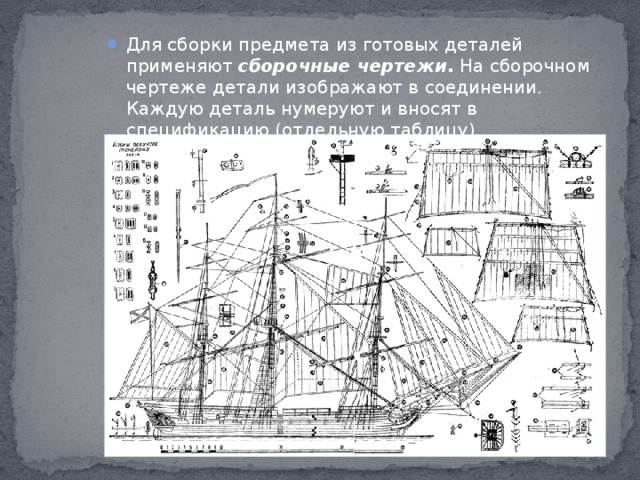
- To assemble an object from finished parts, use assembly drawings . In an assembly drawing, parts are shown in connection. Each part is numbered and entered into the specification (a separate table).
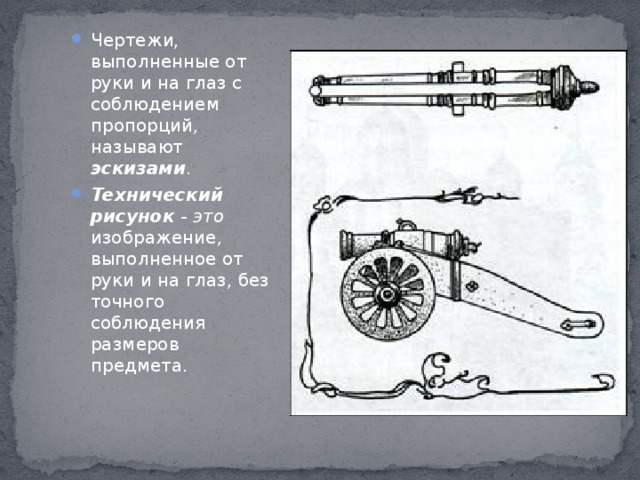
- Drawings made by hand and by eye in compliance with proportions are called sketches .
- Technical drawing - This an image made by hand and by eye, without strictly observing the dimensions of the object.
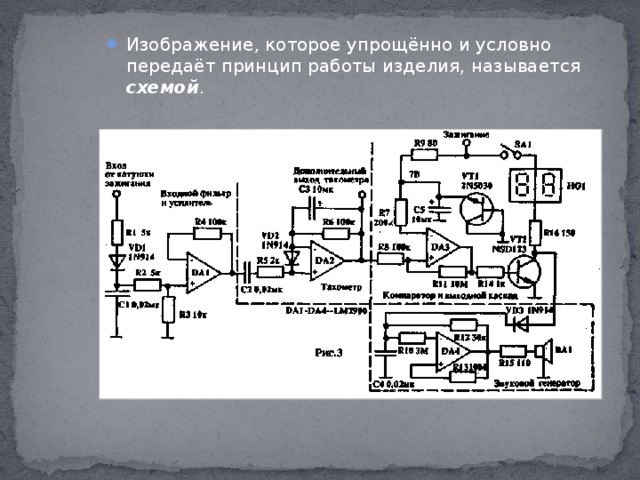
- An image that simplifies and conditionally conveys the principle of operation of a product is called scheme .
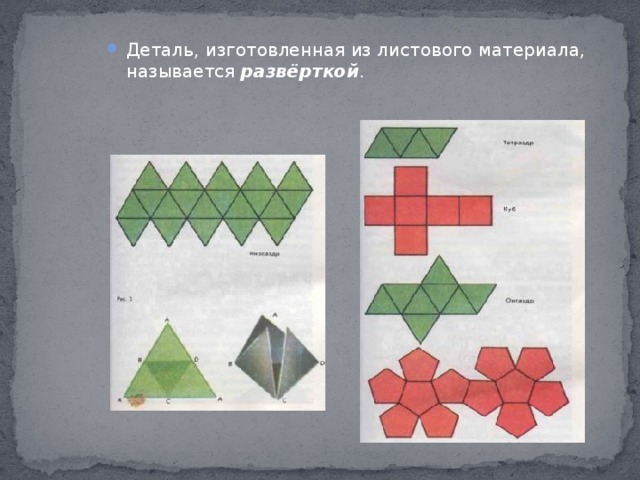
- A part made of sheet material is called sweep .
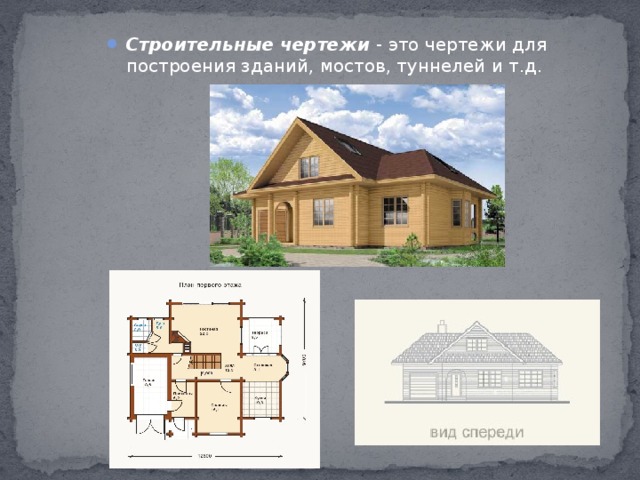
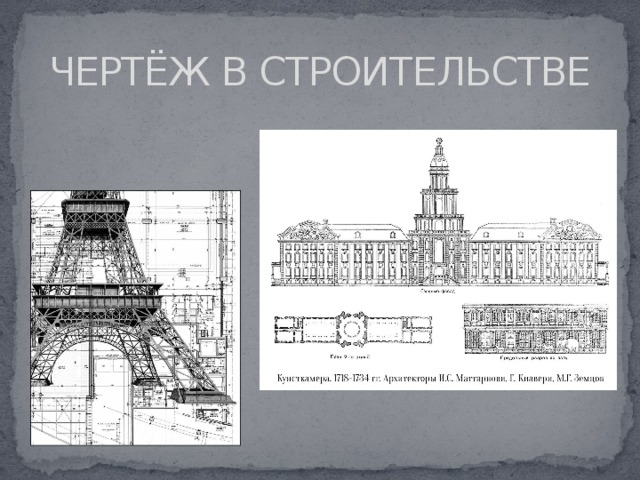
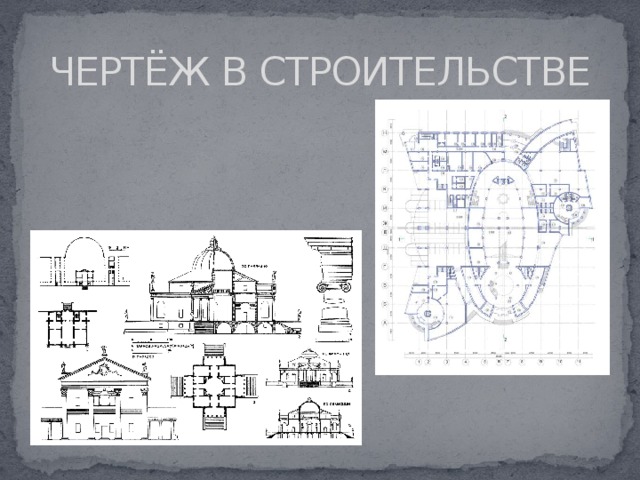
- Construction drawings - these are drawings for constructing buildings, bridges, tunnels, etc.
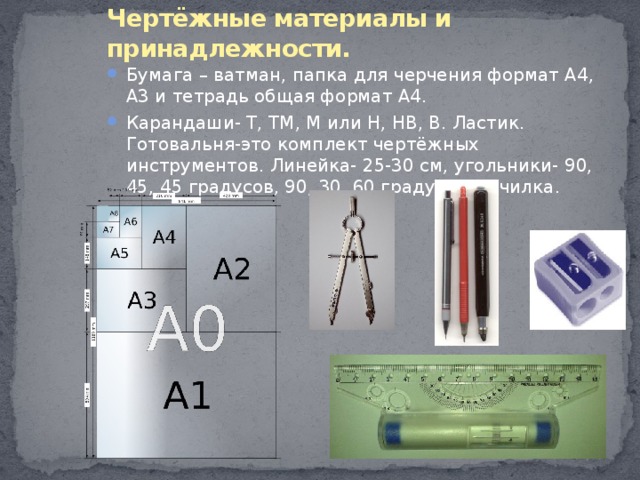
- Paper - whatman paper, a folder for drawing in A4, A3 format and a general notebook in A4 format.
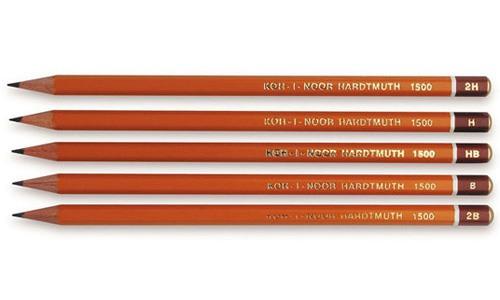
- Pencils - T, TM, M or N, NV, V. Eraser. A workbench is a set of drawing tools. Ruler - 25-30 cm, squares - 90, 45, 45 degrees, 90, 30, 60 degrees. Sharpener.

Techniques for drawing.
- Constructing an image with a pencil.
- Stroke with ink or pencil. The drawing is outlined in the following order:
1. Arcs in all images.
2. Horizontal and vertical lines.
3. Slanted lines.
- Having finished tracing the main lines, trace thin, dash-dotted lines in the same order.
- Corrections of errors in drawings are made at the initial stage of work.
- History of the development of the drawing?
- Tools and devices for completing the drawing?

LESSON IS OVER.
ALL THE GOOD!
Literature:
- Textbook "Drawing"
- Textbook "Drawing"
I.S.Vyshnekolsky, V.N.Vinogradov.Moscow
A set of drawing lessons on CD, version 2011
Subject: Subject "Drawing"
Objective of the lesson: To familiarize students with the history of the development of drawing and, using specific examples, show the importance of drawing in practical activities people. Summarize students' knowledge about graphic images used in drawing. Expand students' knowledge of drawing tools, supplies and materials.
Tutorials, accessories and materials.
For the teacher: training table, samples of required graphic and practical work, completed by students completed by students in previous years, demonstration models, samples of production drawings, screen materials and related equipment. You should also have a set of drawing tools and supplies needed by students.
For students: textbook, notebook.
Lesson plan:
1. Organizational part - 8 min.
2. Conversation with students - 20 min.
3.Watching a movie “ min.
Progress of the lesson.
Since this lesson is the first, you need to prepare especially carefully for it, take all measures to ensure that the students’ attention is focused as much as possible. You need to check the presence of students in the class, their preparation for the first lesson (how each student is provided with the necessary supplies and materials).
At the very first lesson, it is necessary in each class to select three laboratory assistants from among the students for each row of desks, whose responsibilities are to monitor the readiness of students’ work stations, as well as to collect and hand out work. After this you need to move on to the presentation educational material. First of all, you need to tell schoolchildren that in a drawing lesson they will learn how to make and draw up drawings, as well as understand, or as they say, read. In a school drawing course, what will they study? theoretical foundations constructing various images, master the techniques of working with drawing and measuring instruments, learn to create images by hand.
During a casual conversation, it turns out that students have become familiar with many graphic images at school. For example, in fine arts lessons, when they made drawings of objects from life. In mathematics and geography lessons. In physics lessons, as well as in classes on technical and service work, diagrams are widely used. It is useful to emphasize that the knowledge acquired in drawing lessons will be useful to schoolchildren when studying other school disciplines. They may be needed in the future when they work in factories and construction sites.
Then show samples of mandatory graphic and practical work,
completed by students in previous years. It is necessary to explain to students
that throughout the entire training period they will perform some of the graphic work on drawing paper A 4, and some of it in a workbook.
Explain how and with what tools and accessories certain graphic images are made, how to prepare everything necessary for the lesson. Show the preparation of tools for work in real life,
and methods of work - according to the training table or textbook. Can be demonstrated
some techniques for working with drawing tools on a chalkboard.
Remember how Alyosha Peshkov learned to draw lines. “I had a lot of work: I performed the duties of a maid, cleaned the samovar and copper utensils, and on Saturdays I washed the floors of the entire apartment and both stairs. He chopped and carried firewood for the stoves, washed dishes, peeled vegetables, walked with the hostess around the market, carrying a shopping basket behind her, ran to the store, to the pharmacy.
One day the owner came into the kitchen with a tube of thick paper in his hand, a pencil, a square and a ruler.
When you finish cleaning your knives, draw this!
The facade was depicted on a sheet of paper two-story house with many windows and moldings.
Here's a compass for you! Measure all the lines, mark their ends on the paper with dots, then draw along the ruler with a pencil from point to point. First along - these will be horizontal, then across - these will be vertical.
I was very happy about the clean work and the beginning of the study, but I looked at the paper and tools with awe, not understanding anything.
However, immediately, having washed his hands, he sat down to study. I traced all the horizontal lines on the sheet, checked them - good! Although three turned out to be superfluous. I ran all the vertical ones and was amazed to see that the face of the house had been absurdly distorted: the windows had moved to the place of the walls, and one, having moved beyond the wall, was hanging in the air, next to the house. The front porch also rose into the air to the height of the second floor, the cornice ended up in the middle of the roof, the dormer window was on the chimney.
For a long time, almost in tears, I looked at these irreparable miracles, trying to understand how they happened.
After marking the destruction of the façade with a red pencil, the owner gave me more paper.
You'll keep drawing lines until you get it right...
My second copy came out better, only the window ended up on the porch door. When I finally managed to make a copy of the facade similar to the original, he liked it.
You see, he did it! So, perhaps, you and I will get to the point soon...”
The depiction of the facade of the house, as we see from the story, was reduced mainly to drawing a series of mutually perpendicular lines. They are easy to apply without distortions using a drawing device that has two rulers, a rotating head, levers (Fig. 1) or a coordinate system (Fig. 2).
Rice. 1. Drawing device with levers Rice. 2. Drawing device with a coordinate systemThe same results can be achieved using a crossbar and a square. By moving the rod up and down the board, any number of horizontal lines are obtained; moving the square along the rail - vertical. If there is no straightening line, use a ruler and a square or two squares. Drawing parallel lines only using a ruler “from point to point” often leads to skewed lines and approximately twice the time lost.
Try to draw several parallel lines yourself, using one ruler and a ruler with a square, and then compare the results.
| Basics drawings. Lines ( lesson 1) - YouTube |