How to make your own runes. Making runes with your own hands
So, you have decided to make your own set of Runes with your own hands. What kind of wood are runes made of? Which tree is right for you? You will find the answer in this article.
If, after reading, you still have questions or doubts, we will be happy to help you decide on the choice of wood species.
BEECH

Beech is a symbol of ancient knowledge, revealed in relics, ancient temples, spells and manuscripts. Beech is a conductor from the past to the future, transferring knowledge from generation to generation. He is able to accumulate information and keep it in himself for centuries. In the esoteric tradition of the North, the runes Nautiz and Perth are associated with beech.
From the master: Beech is a hard tree, but has a soft, enveloping energy. Beech dice are very pleasant to the touch, you will feel it as soon as you take them in your hands. It's a pleasure to work with him. It is not as difficult to carve and burn on beech as on ash and oak - beech is not fibrous and, despite its strength, is quite soft to work with. If you have never carved or burnt runes, but want to do it on hard wood, then beech is the perfect wood for you. My own Runes were carved by me on beech. Beech is suitable for any person, there are no restrictions on interaction with it, unlike, for example, elm and oak.
ASH


Ash symbolizes the divine nature of mankind. Helps a person to find his true purpose. Activates energy for clairvoyance. It enhances the ability to foresee those who sincerely want to see their future. This is a tree of rebirth, renewal. The bright Runes of the Elder Futhark - Gebo and Vunyo are associated with it. Ash also personifies the connection of two worlds - the world of gods and the world of people, the spiritual world and the material world, and therefore is connected with the Runes Ansuz and Evaz. Ash is a tree suitable for all kinds of divination and magic.
From the master: Ash is a hardwood. The structure of the ash tree is fibrous. It will take strength and skill to carve Runes on it. If you have never carved Runes on an ash tree, then you will have to be patient. Be sure to get a few spare dice for the main set in case you can’t immediately cut out some of the Runes. Don't go to work when you're low on energy or haven't had enough sleep.
If you want to burn Runes on Ash, then this can be difficult for a beginner too. However, it is undoubtedly much easier than cutting. The tool must be well heated.
Applying Runes with paint is not difficult.
ELM


Elm in the esoteric tradition associated with the Gebo rune. Elm is an exclusively male tree, it gives preference to men. Elm supports and develops the spiritual qualities of a real man. This tree will help you develop any bold undertaking, support you in a new business, project. It gives strength to the persistent, stubborn and hardworking. Elm will also help you get rid of fuss, petty worries over trifles. One contact with elm will last you for many years. In the Middle Ages, knights made spears from elm, because it was believed that elm spears instill courage in a warrior and bring good luck in battle. In magic, the elm brings stability, support, and reliability to the spell.
It's important to know! Elm will not support someone who is not ready to take responsibility, is used to complaining and considers himself a loser. If you are not ready to fight, you are in a depressed state, if you do not have mental and physical strength, and you think that you are chronically unlucky, pay attention to another tree, for example, an apricot.
From the master: Elm is a medium-density wood species. Its structure is quite isotropic and even slightly porous. Carving runes on an elm is not a big deal.
OAK


Oak is a mighty tree, a symbol of longevity and great vitality. The esoteric teaching connects as many as six runes of the Elder Futhark with the oak - Turisaz, Evaz, Raido, Teyvaz, Yaro and Dagaz. Oak is used in spells aimed at protection, increasing physical strength, achieving stable success. This tree can seriously change a person's life for the better.
Oak is also a powerful energy donor. It will give you as much energy as you can take from it. Calms the soul, balances the work of the heart and nervous system, normalizes blood pressure.
It's important to know! Oak is a tough tree. His aura is very powerful, but it only perceives healthy people well. If a person has a serious chronic disease or is seriously ill, then it is better for him not to interact with this tree. If we are talking about infrequent and slight ailments, but in general a person is healthy, then oak, on the contrary, will help balance the flow of energies in the body and strengthen health.
Oak prefers wrestlers, strong and healthy people. He will heal wounds and share a piece of his longevity.
From the master: Oak wood is reliable and durable, has a fibrous structure. If you want to carve runes into an oak tree, you must be prepared for some pretty difficult work. However, the results will justify the effort. Oak firmly holds the energy of the sign, carved runes will last you a lifetime.
APRICOT


Apricot is a donor tree with nourishing energy. This tree personifies the Sun, gives vitality, joy and harmony. Apricot makes a person kinder, softens his character and smooths out sharp corners in relationships with loved ones. Apricot is used to attract love, build relationships, establish mutual understanding. Protects against infidelity and unnecessary stress in a love relationship. If something oppresses you, or you are in a depressive, apathetic state, then the apricot will share its positive energy with you and inspire you with hope and inspiration. The tree has no contraindications, suitable for everyone.
From the master: working with apricot is easy and pleasant - its wood is pleasant to the touch, durable, not fibrous, and carving runes on it is not difficult.
ASPEN


Aspen- a tree that absorbs negative energy. This property of aspen is considered magical. Aspen helps fight evil spirits. Contact with this tree will protect your aura from harmful and dangerous influences. Communication with aspen helps with nervous conditions, obsessive thoughts, causeless anxiety, phobias. In magic, the aspen is considered a tree that averts death. It awakens the inner healing resources of a person, makes it possible to come into contact with one's true essence, to understand one's desires. It perfectly separates the superficial (masks of a person) from the real (the essence of a person). Absorbs pain, relieves negative emotions. If you attach a piece of wood to a sore spot, then it will draw out the disease.
From the master: Aspen has a rather soft wood, pleasant wood. Working with it will not be difficult even for a beginner.
LINDEN

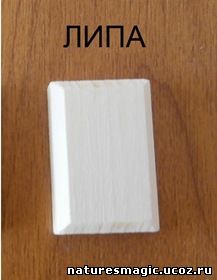
Linden- symbolizes joy, warmth, tranquility, protection, harmony. Helps to get rid of depression, pessimistic thoughts, depressing memories. Protects relationships from quarrels, gives strength to resolve conflicts. Stabilizes the atmosphere in the house, cleanses the house of excess, unnecessary energy, takes all the negative "on itself".
Linden helps business people to negotiate, conclude successful deals and establish partnerships.
Linden will help a woman in childbirth, give the newborn health.
From the master: Linden - soft, light, pleasant to the touch tree. It is easy to cut on it even for those who have never tried to do it. However, if you are going to burn Runes, then be careful: the material is very soft, and you need to adjust the pressing force. Also, runes can be applied to the linden with paint.
CEDAR


Cedar has the most powerful energy. He is able to almost instantly help a person under stress: calm the nerves, give strength. Communication with cedar is also recommended for those who cannot cope with depression on their own: cedar will give mental strength, energy, restore the ability to feel joy and restore self-confidence. Cedar is an excellent protector from attacks by negative energy entities. It has cleansing properties, will help to recover from a long illness. Cedar was associated with immortality and fertility, because it was believed that its wood was not subject to destruction. Another property of cedar is help in improving the financial situation. A piece of cedar, placed in a pocket, purse or wallet, will be a kind of magnet for attracting money. The tree is suitable for everyone, has no contraindications.
From the master
: cedar has a dense, strong and uniform structure, while being quite soft and comfortable to work with. Carving on cedar is relatively easy. This tree is also ideal for burning out.
BIRCH TREE
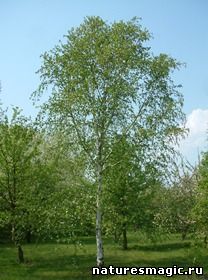
Birch- a very gentle, soft, affectionate and compassionate tree. Despite this, she has a very strong influence, especially if you are in contact with her often or constantly. Birch protects from all misfortunes - physical and spiritual. This tree is used in healing. Birch is suitable for those who feel sick or weakened, it restores strength, relieves pain and suffering, helps to endure illness more easily, promotes recovery. Birch is especially good for women, young girls. It heals from female diseases, gives female strength, tenderness and attractiveness. Communication with a birch is useful for those who feel irritability, nervousness, as well as for those who are in apathy. Birch will relieve fatigue, give harmony, tranquility and balance. Birch is also known for its ability to protect against nightmares.
Birch has a good effect on newborns and babies: it protects them and cleans the "thin" space around the baby's crib. Pregnant women are also advised to keep in contact with this tree. A huge number of magical artifacts are made from birch. For example, amulets designed to protect against evil spirits.
From the master: birch has a fairly dense and uniform wood, pleasant to the touch. Working with this tree is not difficult, it is convenient to cut and burn it.
PINE

Pine- a tree of insight on the spiritual and intellectual levels. She supports in creative projects, plans. Relieves stress, treats nervous disorders, relieves feelings of guilt, irritation. This tree is cleansing - it cleans the energy space around a person, his aura, energy. To a person who really loves pine and to someone who comes to her for help with an open heart, she gives very powerful support. It slows down the flow of energies that cause aging. It is no coincidence that for many nations the pine is a symbol of immortality.
However, pine has contraindications: it can exacerbate angina pectoris, i.e. people who have severe heart failure should be more careful. However, this applies rather to long and close communication with a tree (for example, hourly walks through a pine forest).
From the master
: As for working with this tree: the pine is not very tough, but fibrous. When working with it, special strength is not required, however, accuracy is required. It is very pleasant to work with this tree also because it has a pleasant coniferous smell.
CHERRIES


Cherries its magical properties are similar to cherries. She is also a symbol of love and is used in magic to attract love feelings. In ancient times, various rituals and divination were associated with this tree. These were rites of attracting love, divination by the number of years of life, and in some magical rituals, cherry juice was used instead of sacrificial blood. In Slavic languages, there are two different names for these trees - cherry and sweet cherry, however, in the languages of the Romano-Germanic group, one word is used to designate them, which means "cherry". And cherries are divided into sour and sweet (which the Slavs call cherries).
From the master : sweet cherry is a fairly dense wood, similar in density to beech, but not so uniform, with beautiful veins from light to brown. It is quite comfortable to work with cherries.
CHERRY

Cherry is a symbol of love, passion, fertility. If you plan to guess about feelings and relationships, or make yourself a talisman for love, then cherry will create a suitable atmosphere for this and enhance the necessary energies. Cherry will also charge you with positive emotions, attract good luck. Is a donor, i.e. energizes a person. It is considered a "feminine" tree.
From master: Cherry in its structure and density is very similar to cherries, it is also comfortable to work with due to the fact that its structure is more uniform than, for example, oak, ash or pine. On the cherry it is convenient to both burn and cut. The pattern of the cherry is similar to the cherry, with transitions from light beige to brown, but overall has a lighter color.
APPLE TREE


The apple tree symbolizes love, healing, immortality, rebirth. In Scandinavian myths, the goddess of spring and youth, Idun, had a basket of rejuvenating apples, which she willingly shared with the gods, helping them to maintain eternal youth. The apple tree is also known as a symbol of prosperity and wealth. The tree is a donor, gives the ability to enjoy life, awakens sensuality.
From master: The apple tree is one of my favorite breeds. On an apple tree it is convenient to burn out and cut Runes. Surprisingly warm tree, uniform in structure, with a beautiful pattern inherent in many fruit trees.
I hope this article will help you decide on the choice of tree. In our workshop, you can always look at and choose blanks for making runes from the tree species listed in the article.
Wish you luck!
How to make runes? We will tell! To get started, choose which material suits you best - wood or stone. And keep in mind that the runes that you plan to use for personal purposes are best done by hand. Filled with your energy, they will have the most positive effect.
Properties and meanings of different types of wood
Different types of trees have different meanings. This is important to consider when choosing the right wood for rune making.
For example:
- Ash is a tree of protection. This is an excellent material for the manufacture of runic amulets, the action of which will be aimed at protecting a person from any negativity coming from outside.
- The apple tree has the strongest ability to attract love into a person's life, to make him attractive to the opposite sex. Therefore, apple tree amulets are most suitable for making amulets that will help solve all the problems associated with personal relationships.
- Oak has powerful healing properties. Amulets made from this type of wood help to strengthen and restore health.
- Choose the wood available to you. In winter, spruce is well suited - it is easy to find branches in the nearest forest or grove.
It is best to use tree branches to make wooden runes. The easiest way is to cut them into circles, from which you will make runes.
How to make runes from wood: an algorithm
The algorithm for making runes at home is as follows:
- Saw the branch into thirteen circles. The approximate thickness of each is 3-4 centimeters. Removing the bark is optional, but you can do it if you wish. Tip: if you don't feel like messing around with sawing, get ready-made wooden blanks in a store with esoteric goods or in a stall with building materials
- Take a piece of hard sandpaper and work the blanks to even out their surface. At the end, cover the circles with clear varnish and wait until it is completely dry.
- Using a pencil, draw images of runes on each circle. Then, using a knife, make cuts along the applied contours. First, make the main lines, the largest, and at the end - the small ones. Vertical cuts are made from top to bottom, and diagonals are drawn from left to right.
- After that, you can paint the runes in the desired color. Wait until the paint is completely dry, and again cover the runes with clear varnish
Ready! You can start using ready-made runes.
Important: Learn the meaning and description of each symbol. Each rune has its own color, in which it will need to be painted. Strictly make sure that the pattern of the rune corresponds to its correct outline. One wrong cut and the rune will become unusable, turning into a useless piece of wood.
How to make runes at home from stone
To find stones suitable for making runes, go to the shore of a reservoir - a river, lake or sea. It is necessary to find small pebbles of a round shape with a smooth, polished surface. They must be flat.
If you remember how in childhood they let “pancakes” through the water, then you will immediately understand which stones are suitable.
Once you have found thirteen stones of the right size and shape, rinse them under running water and put them away to dry. It is best to dry in the sun - then future runes will be properly charged with positive solar energy.
Inventory for the manufacture of stone runes
To make runes from stone, you will need the following inventory:
- A small brush with stiff bristles, which will be convenient to apply the rune pattern on the stone
- Transparent varnish for fixing the image
- Enamel or any other quick-drying resistant paint. Wish it was waterproof
- Pen, toothpick, small stick with a pointed end - a tool that will be convenient to apply paint to the surface of the stone
- A rag or napkin with which you will remove excess paint
After you prepare everything you need, you can start making runes. Watch a video on how to make runes at home:
Algorithm for making runes from stone at home
So, start making runes in the following sequence:
- Take the prepared stones and carefully coat them with clear varnish using a brush. Wait for the varnish to dry and make sure that there are no unpainted areas left.
- Draw the image of each rune on the stones with a stick and paint. Choose a paint color that matches the meaning of the rune symbols. The lines should be clear, straight, have the same thickness. Do not overdo it - it is better to use less paint so that it does not spread and you do not have to redo it all over again
Tip: before drawing, you can schematically draw the image of the rune on the stone with a simple pencil. Also practice drawing runes on paper so that there are no difficulties when you depict them on a hard surface.
Finally, coat the stones with clear varnish again to preserve the image for a long time.
How to store runes?
Runes are important not only to make, but also to store them correctly. To do this, you need a bag made of dense natural fabric - it was in such bags that ancient shamans carried runes with them. The ideal material is linen. A bag made of genuine leather is also suitable.
It must be tied with a string. If there is a desire to add decorative notes, you can embroider colored threads or beads on the bag.
Keep the runes in this bag always - they should be out of reach of prying eyes. Only the owner is allowed to see them.
If you want to learn how to make runes with your own hands, you need to have at least basic knowledge about them.
Magical science has existed among us since ancient times. Starting as magic, it gradually flowed into the concept of "magic". The people who took possession of it during the time of the Inquisition were, for the most part, burned at the stake. But those who managed to survive passed on their knowledge to others and thus left it for centuries. Today, few people live with magical abilities, but they all perfectly master their skills.
In general, magical practice is a certain position of the body and consciousness in space and time: it does not require any charmed objects or amulets. However, man is a living being subject to and influenced by mood swings. Especially in order that this does not interfere with the qualitative manifestation of magic, special items were created. Thanks to them, any magician, no matter how bad his mood, can tune in to the right wave and enter the astral plane faster.
Runic magic is one of the varieties of magic. It uses many charmed items, but the most effective and often used are runes. Used in a set consisting of plates and a runic alphabet, they are able to give out much more information than other types of objects of magical properties.
We are consulted by a well-known astropsychologist in Moscow Julia!
The appeal will allow you to get a consultation, a natal chart, a cosmogram, a person's design, a psycho-portrait, as well as tarot divination. Astropsychologist - Julia will help you sort out financial problems, improve your family level. Find love, resolve disagreements with loved ones. Reveal your hidden talents, steer your career in the right direction and tell your destiny.
Get a consultation right now, write to the mail
Or in telegram @astrologslunoyvDeve
If you have any questions about any of the articles or you want advice from a real specialist - write to Julia.
Where can you buy runes?
You can purchase a rune set for yourself in three ways:
- In souvenir shops or specialty stores. Sets are sold as items for divination, but do not have sufficient magical power.
- Practicing magicians. They sell runes already consecrated.
- Make runes with your own hands from stones, clay or wood. However, for this it is necessary to do everything in strict accordance with the proposed instructions. But in return, you will receive plates that have been spoken only to you.
In any of these cases, you can become a full-fledged owner of the rune set.
Varieties
Runes are made from a variety of materials, and each of them has its own magical meaning. Can be distinguished:
- Made from wood. Such runes are the most revered and most versatile. They can be applied daily.
- Carved from stone. If you have not yet decided what and how to make runes with your own hands, then you can choose a stone. It is ideal for all kinds of influences.
- Made from leather. Ideal for those who want to improve their financial situation.
- Clay runes. They are most adapted to divination on earthly matters. The polymer base is especially good. It is believed that it is most likely to include spirits with whom you can later establish close contact.
- Black magicians make runes from the bones of animals or dead people, the teeth of a person or animals, from nails.
Technique for making wood sets
When deciding to create runes on their own, a person can choose wood or clay. These two types of material have approximately the same properties:
- They are easily conductive.
- Through them it is easier to learn about your destiny.
- Ease of material handling.
If it is impossible to use polymer clay, it is recommended to use wood. Moreover, taken from a living tree, ash or oak - both of these species are closest to the sacred in the belief of Asatru.
- The first thing to consider is that it does not matter how you processed the plates. They can be uneven, different in length or thickness. The main thing is that you like them and do not break when applying runic signs.
- Apply the image of a runic symbol to each blank. You should use a pencil or a thin marker for this.
- Cut out each rune. It is recommended to use a clerical or mounting knife for this work. When you're done cutting, you don't have to worry about the mismatch between the original and your set. The main thing is that they are comfortable for you and retain the main contours of the product.
When the blanks are completely ready, proceed to painting. You can use permanent paint. However, she is unable to maintain constant contact with the summoned spirits. To fully communicate with them, you should use your own blood. You can get it in two ways: by making an incision on your finger or in a medical center. In the first option, it is recommended to pre-sterilize a fragment or a cutting object. In the second case, you can ask a health worker you know to take blood from a vein and take it with you.
Features of each stage
- Preparation must be done separately. Each rune must go through all the stages separately from the others. It is recommended not to rush when performing this procedure - ideally, if the whole process will take you about 2-3 months.
- Feel the rune. At the time of preparation of each symbol, it is recommended to feel unity with the material. When cutting through or punching a rune, you should imagine its image. Only in this way will you be able to correctly set the plate to work.
- Don't like it - change it. After coloring, you need to look at the rune again and listen to your emotions and feelings. If the record is negative for you, throw it away and create a new one. Examine them often, hold them in your hands or put them under your pillow. Proximity and unity are the most important conditions for the successful creation of a rune set.
Proper storage
So, you have cut out your set, also dealt with the question of how to make an amulet (runes) with your own hands. Now another, no less important question arises: how to store them correctly?
Here the most important condition is the complete secrecy of the location of the runic set. This is due to such a nuance as the storage of your personal life force. With the correct execution of all stages, the runes should retain part of your strength, which is necessary for successful and fruitful communication with the spirits.
When falling into the wrong hands (even relatives), your power can be used both against you and against another person. With the first option, you can die, with the second, you can become seriously ill. To prevent this situation, you should not let anyone see your set.
All runes should be stored in a special bag. It can be made from different materials. It can be applied to the image of Odin or any other Scandinavian god. This pattern will give extra protection to your records.
How to set the runes to work?
The hardest part about working with runes is getting them to work. It requires a well-developed imagination, accuracy and sequence of actions.
The "charging" of the amulets is performed as follows:
- How to make runes with your own hands - you figured it out, now you should imagine the image for which the creation of the plates was started. It is important that there are about three of them.
- The image must be realistic. You should not imagine a keyhole as a security - it is better to imagine yourself in a house filled with warmth and tranquility. This will allow you to set up a kind of protection code in the amulet against someone else's intrusion.
- Selection of an energy source. It is forbidden to use yourself as a source. So you will only waste all your reserves without saving anything. Ideal - connection to other sources.
- Full compliance of the source with the purpose of application. In order for the amulet to work constantly, you should select one main and two additional sources. It is important that they match your goals. For example, when protecting people from negativity, you should connect the amulet to their emotions. And if you want to treat - to the natural environment.
To make the runes work to their full potential, you can program them to hibernate. The set will work when the source is activated and "sleep" - when its activity declines.
Features of creating runes from stone
To learn how to make runes with your own hands, the master class is worth reading carefully.
Along with making a set of clay, you can also use stone. Its processing and preparation is fraught with the following features:
- When looking for a suitable material, you should carefully listen to your inner feelings. If you liked the stone, you should take it with you. No - it is recommended to return it to where it lay.
- In total, you should collect about 26 stones. It is desirable that they all have a size of about 3 centimeters in circumference. However, they must have a flat, oval or round surface.
Manufacturing sequence
Once suitable products have been found and meticulously selected, they should be thoroughly washed with soap and water. At the end of the water procedure, the stones should dry thoroughly in a bright place. This may take as much as one hour, or all three.
Dry pebbles should be varnished with a transparent shade - mother-of-pearl or colorless.
- Preliminary work. It includes patterning practice. Before proceeding to the stone, you should try how to make do-it-yourself runes out of paper: hard or easy?
- Main stage. It is required to prepare the following materials: blue enamel paint, cocktail tubes, soft cloth. Then you can start drawing runes. The paint is applied with a stick and at the same time the name, meaning and connection are spoken out. If this condition is met correctly, the amulet will be charged with energy.
- Execution technique. Each character must be drawn according to the rules. Vertical lines originate from the top, and diagonal lines originate from the left. In total, you should get 24 drawn and one empty rune. The latter belongs to Odin.
Where can I get clay for making plates?
Before you make runes with your own hands in stages, especially from clay, you should correctly find places to search for material. You can find it in the following places:
- In the store - ready-made. The simplest and most unreliable option. Clay will not receive the necessary charge, and the runes themselves will be deprived of their individuality and full strength.
- In the form of dry mixes. They are sold in hardware stores and diluted at home. However, such clay will also not be effective enough, as it will remain dead.
- Outdoors. It should be searched on slopes, in lowlands and other places saturated with moisture. Such clay, obtained by labor, will receive a maximum charge and remain alive even after processing.
Clay preparation rules
After the clay is brought home, it should be shaped into a future plate. Then the workpiece is rubbed with a soft object and laid out on a lighted place or near a heater for drying. The process takes about a week. It is important to cover each plate with a bag with a little air for a couple of days. After hardening, the package is removed.
After drying, all products are fired. This procedure is performed as follows. Sand is laid out on a solid cast-iron surface, plates and a pot are placed on top. Heating should be done slowly: from a low temperature to the highest. The heating process should last 6 hours.
Before you make runes with your own hands from clay, the blanks must be completely dried.
Writing symbols on clay
Before you properly make a fehu rune with your own hands, as well as subsequent runes, you should prepare brushes and paint.
All further procedure is performed in the same way as when working with a stone. As a coloring material, you can use paint, gouache or your own blood. One thing to keep in mind: when applying the last remedy, several layers must be applied - in order to avoid absorption and image loss.
What do you need to know about runes?
When studying runic signs, you should carefully peer into each image of the symbol, and also remember its meaning: it will depend on how well you can master this art. It is advisable to memorize all the names with an understanding of their true meaning.
What is not allowed at work?
After reading how to make runes with your own hands, making will be the easiest thing for you. However, do not forget about the following prohibitions:
- Use a single power source for your set.
- Connecting runes to yourself or to other people - only emotions are allowed.
- Transfer the set to third parties or use others to achieve your own goals. You can use only those that are made independently, purchased in a souvenir shop or bought from a magician.
- Use excessively strong energy sources. They can devour you - without the right to life.
- Use an amulet to induce damage. It can come back and eat all your energy.
- It is not clear to imagine images.
Following these prohibitions will help you use the runes to one hundred percent.
Runic magic today is of increasing interest to beginner esotericists, but before buying a practice kit, many of them are wondering how to make runes with their own hands, and in general, is it possible. We have created a detailed instruction for you with all the answers on this topic.
Why do homemade runes work better?
Any magical object that the esoteric comes into contact with during work interacts with the energy of its owner, thereby creating a strong energy connection that works in both directions: from the esoteric to the object and vice versa. It is not for nothing that there are special rituals for charging new Tarot decks, amulets, pendulums and other tools of magical work.
When a person makes a magical instrument with his own hands, he transfers much more of his own energy to it, which means that the object becomes closer to its master even at the time of creation. All this is fully applicable to the runes.
Of course, you can buy a ready-made kit, charge it and successfully use it in practice, but nevertheless, knowing how to make runes with your own hands will still be useful, because after some time you may want to work with your own hand-made futhark.
General rules for making runes at home
Before you make runes yourself, you should familiarize yourself with simple but important rules so as not to confuse anything in the manufacturing process and not nullify the result of your work.
- Ask yourself: Are you really ready to create your own kit? Remember that these are not toys, so the rule “I will try, and if it doesn’t work out, I will give up” does not work here. Once you start making runes, you must finish them.
- Practice drawing runic symbols correctly, since it will be impossible to correct the erroneous inscription on an already finished object (it doesn’t matter if it’s stone, wood or paper). In addition, the runes may simply not want to work with such a "careless" master. If you think that instead of a spoiled pebble, you can simply take another one, then you are mistaken - you should not do this. Some runologists argue that if you don't get one rune, then the whole set needs to be redone.
- Do not start crafting your own runic kit if you are sick or in a bad mood. Remember that rune making is not so much a technical work as it is an energy work, so you should feel good and have a decent supply of energy.
- Choose the right material for the set: it should be pleasant to you personally. The most popular runes are made of wood and stone, but paper is also quite suitable for the first experiment. There are craftsmen who make runes from polymer clay, leather, and wax.
- Do not hurry! Do not set yourself the goal of making the entire set in a few hours, it is better to try to make the runes with your own hands in stages, without haste, because only this approach will be the most fruitful. This is a magical work, not an assembly line!
- Before you draw a rune directly on the material, hold all the blanks in your hands, look at them and try to feel which one is more suitable for this symbol. Do this with every rune.
- Remember that all vertical lines of the symbol must be drawn from top to bottom, and not vice versa, and diagonal and oblique lines - from left to right.
- While drawing the image of the rune, think about it, about its meaning, say its name aloud or to yourself - this will attract its energy to you and tune in to contact with it.
- Don't ask anyone for help! If you can't make your own runes, then it's better to just buy a ready-made set from the store and charge it. Making your own set is an individual process, not a collective one, so you should not involve an outsider in working on it, even if he is an artist from God or a wood carving master.
How to make runes at home from wood
Wooden runes are considered the most popular, as this material is closest to nature. Those who have chosen wood for work immediately wonder which breed is best suited for a runic set. The correct answer is any! Focus on your own feelings, compare several different breeds, touch them, try to feel. However, some runologists believe that a set from the tree that originally grows in your area, and not imported from other countries, will work best. For Russia, these are birch, oak, elm, larch, maple, spruce, pine, willow and others.
If you have decided on the material, it is time to figure out how to make runes from wood with your own hands.
- Make wooden blanks. Usually they look like rectangular or oval dice of the same size in the amount of 25 pieces (24 Elder Futhark runes and one empty Odin rune). You can make them with a wood cutter.
- There are several ways to apply images of runes to blanks: cut them with a chisel, burn them with a wood burning machine, or simply paint with paint, or, as some masters advise, with your own blood. Some combine the two, such as cutting and painting.
- The finished rune can be sanded and varnished if desired. If you like colored runes, you can paint wooden blanks with paint before drawing the symbols.
How to make runes with your own hands from stone
Stone is the second most popular material after wood. Most often, to create your own set, pebbles collected on the coast of the reservoir, or natural stones are used. If pebbles can be easily matched to size, then with natural stones the situation is more complicated, so you have to spend a lot of time finding pebbles of the right size.
Pebbles are recommended to be collected early in the morning in a secluded place, for example, on a shallow or in a deserted corner of an old park near a pond. In no case do not pick up stones near cemeteries, on the ruins of buildings, on roads - such materials are saturated with negative energy, so they are not suitable for work.
And now about how to properly make runes from stone:
- Rinse all stones under running water and let them dry on their own.
- Prepare the surface of the stone for painting. To do this, cover the stones with a transparent varnish and let it dry. If you want the runes to be colored, use an oil colored varnish.
- After the varnish has dried, you can draw a symbol on the stone. It is better to do this with enamel paint - it is more resistant.
- When the enamel dries (after about a day), cover each rune with another layer of clear varnish. After the paint has dried, the kit can be charged and used!
How to make a paper rune kit
Those who are wondering how to make do-it-yourself runes out of paper are the luckiest, because this method takes a minimum of time. But at the same time, it is worth considering that a paper or cardboard set will not serve you for a long time, so such runes are only suitable as a first experiment and for those who are not sure that they will be doing runic magic all the time.
The algorithm for creating paper runes is simple: rectangles are cut out of thick paper or cardboard of the same size, after which runic symbols are applied to them with paint, a marker or their own blood (there are those who prefer this particular method). After that, the paper set can be laminated to make it last longer.
Making runes from bone, clay and other materials
If you are thinking about how to make runes at home, but paper, stone and wood do not appeal to you, try turning to other materials. Do not listen to those who claim that only wooden and stone runes will work - all this is nonsense! In fact, your energy connection with runic symbols is important, and what material they will be made of is the tenth thing. The main thing is that you like them and you feel them.
So, if you didn’t follow the classics and decided to choose a different material, pay attention to the following options:
- bone
- metal
- polymer clay
- salty dough
The technology for making runes from bone, metal and leather, in principle, is similar to wood and stone: first you need to cut blanks with a suitable tool, and then apply runic symbols to them. It is generally easy to work with polymer clay and salt dough: the blanks are formed by hand, after which they are baked in the oven, then they can be painted with colorless varnish and, after drying, symbols can be applied to the prepared surface.
How to charge homemade runes
In fact, you need to charge a ready-made rune set bought in a store. Home-made runes are saturated with your energy even in the process of creation, so all that is needed is to leave the unfolded ready-made set on a white fabric for literally a day, after which you can already get to work.
But, if you are the type of people who definitely need some kind of ritual, you can use recharging with the help of elemental energy. The methods of such activation are different, and each runologist conducts this ceremony in his own way. The main thing is to use elements corresponding to the elements, for example, an incense stick or incense for air, water for water, a candle for fire, salt for earth. Carry the runes through the smoke from the incense, over the candle, sprinkle with water and hold in salt, while mentally or aloud turning to the desired element and asking her for help. You can come up with your own ritual - in runic magic this is allowed.
How to store a homemade kit
You need to store homemade runes in a special bag or box, away from prying eyes, for example, in a closed desk drawer. It is better to make a "house" for runes with your own hands. A beautiful wooden box is also suitable. After divination, do not forget to remove the runes, do not leave them lying on the table. And most importantly - do not give your runes into the hands of strangers, even if it is a member of your family, not a whole set, not one at a time. Runes are very sensitive to human energy, therefore, for proper operation, only their owner can touch them.
That's all. Now you know how to make runes and activate them. Good luck with your work!
People who are interested in fortune-telling and predicting the fate of a person know that the tool that is made by one's own hands works best in the hands of a practitioner. He gives more accurate and truthful answers to exciting questions and reveals situations as they are. Therefore, many are interested in the question of how to make runes that can become an excellent tool for divination.
Do-it-yourself runes most accurately answer important questions
It is quite simple to create fortune-telling runes with your own hands, the main thing is to be as concentrated as possible on this activity and take it seriously and responsibly. What material is suitable for creating runes
Runemaking begins with the choice of material from which a tool will be created that, in skillful hands, will tell the whole truth. Practitioners recommend applying runic signs to a surface that is of natural origin. As a source material can be used:
- wood;
- stone;
- metal;
- clay;
- salty dough;
- fruit bones.
If a person decides to make runes out of wood, you should pay attention to which tree species is associated with his sign. This will strengthen the connection between the runes and their master for greater prediction efficiency. The same applies to the decision to create runes from stone with your own hands.
The use of materials that are completely artificial is strictly contraindicated. Mages also do not recommend using paper as the main material for making runes. Such advice is motivated by the fact that, due to chemical treatments, the connection between paper and nature is severely broken, and such runes will not accurately show answers and advice.
Making blanks for runes
After a person has decided on the material for his personal runes, you can start making blanks. They must all be the same size. The most practical are runes, the dimensions of which are 4x3x1 cm.
During the process of creating blanks, a person should be surrounded by silence, and he himself should be focused on the result of his work. Before drawing another runic sign on the workpiece, you need to pronounce the name that the rune has and realize your personal attitude towards it. In order to do this, it is important to clearly know both the name and the meaning that the rune carries.
Many people who are interested in runemaking wonder if it's worth it to cover the runes with paint after all the signs have been inscribed. This step is optional. However, some practitioners claim that signs that are clear and bright will provide more accurate information when used.
If a person nevertheless decided to paint his runes, it is best to choose natural paint. The red color of the pigment will be the best color scheme for the runes. There is also an opinion that the runes written in the blood of the owner are the most powerful.
During the search, focus not only on the breed, but also on the inner feelings. Trust your intuition, and it will lead to that tree, the branch of which will be the ideal material for strong runes.
Before cutting a branch, you should ask the tree for permission and explain why the person decided to cut the branch. Many magicians have established a mental-emotional connection with trees before using their bark or branches for their magical purposes.
Although metal is also a suitable material, runesmithing is much less common than carving them into wood or creating a rune set from stones.
How to store runes
A hand-made set of runes must not only be properly made, but also preserved. Compliance with a number of simple recommendations will allow the owner not to lose touch with the runes and always receive accurate and truthful answers by referring to his prediction tool. The rules for storing a rune set are as follows:
- Finished products are best protected from the eyes of strangers. Therefore, they are usually stored in bags.
- Never let anyone use your runes. This will preserve the fragile energy connection between the owner and the set.
- Try to contact the runes not only in moments of divination, but also in others. Going about your business, take the runes, sort them out. This will allow you to maintain a strong energy charge of the set, which was incorporated into it during creation.
Summing up
Runes are quite a powerful tool in the hands of a mystic. Making your own runes is quite simple, it is important to choose the right material for the blanks and correctly draw runic signs on the surface of the runes.
In order for the set to be strong, it is best to make it from natural materials that will match the energy of the owner. Therefore, when choosing the basis for a rune set, do not rush and trust your inner feelings.
The most widespread rune sets made of wood. Their production does not require much effort from a person.
Runes made of wood are the most popular
In order for the runes to always tell the truth and help the owner, it is important to store them correctly and constantly maintain communication, nourishing it and restoring the original energy charge.
The creation process should bring pleasure and pleasant emotions, so if a person is dissatisfied with the created rune, it is better to destroy it and make a new one.
Following ancient traditions will allow you to independently make runes for divination or witchcraft. Consider the basic rules on how to make runes with your own hands: what is better to make from, how to make from wood or stone, how to paint correctly.
In the article:
How to make runes with your own hands - general manufacturing rules
According to the Elder Edda and the Scandinavian-Germanic mythological tradition, runes are fundamental symbols, the action of which is axiomatically embedded in the universe. Practitioners compare their action and constancy with the laws of physics.

An example of runes made at home
The tool requires a sensitive understanding of how it works. Any mistake gives the opposite result: in divination, the symbols will begin to tell a lie, confuse, and in magic they will lead to consequences.
To contact the symbols, they make runes with their own hands. One of the basic rules is not to allow other people to the manufacturing process and work.
Natural materials are chosen: sea pebbles, wood, bone, fruit seeds, clay, salt dough. The best options: stone, bone, wood - have high strength.
How to make runes at home from wood
 Wood - one of the available materials, is easy to process. There are no requirements for the type of tree. By tradition, women make signs from birch or willow (typically female trees), men - from yew or oak.
Universal option - ash, which is considered the world tree Yggdrasil with a key meaning in Norse mythology.


Looking for the right fit. They do not purchase already processed boards, finished wood: the materials contain traces of someone else's energy. A branch of suitable size is cut from a living tree, having processed the cut. It is better if the tree is planted and grown independently. If you don’t want to harm a living creature for the sake of symbols, they are looking for a suitable piece of wood with a minimum amount of someone else’s processing, giving the tree a new life.
Of the tools, they are limited to a simple knife, saw, sandpaper. It is not necessary to remove the bark from the tree. With a knife, cut out the inscriptions on the finished dies for lack of incisors, with which the work is easier. To extend the life of the dice, wood is treated, the product is varnished.
How to make runes from stone

How to make dice of stone
Sea pebbles require minimal processing. It is enough to walk along the seashore, collecting pebbles of suitable size. Even the search process will help the future connection with the dice: they select only the stones they like.
They also buy ready-made cabochons: stones are not as sensitive to other people's hands and processing as other materials. They are kept under running water for cleaning. Another way to cleanse is to place it in moonlight on a full moon.
Carving symbols on stone is more difficult than on wood - it will be difficult without tools. If you work with pebbles, a strong screwdriver, a hammer will suffice. In the process, you can split several pebbles - they are collected with a margin. Engraving equipment is not prohibited, which, if they have the skills, work with any stones.
How to make runes from bone, clay and other materials
 If wood and stone are not suitable, choose any other material. One of the most ancient and widespread is bone. They take it at the meat market, boil it for several hours to clear it of meat. The bone is sawn with a hacksaw or jigsaw. Cut along the bone with incisors or a sharp knife. Bone is more difficult to process, mistakes happen.
Working with fruit pits is simple. They are not prepared for work, but symbols are cut out with an ordinary knife. Material disadvantages:
- insufficient aesthetic value;
- throwing discomfort;
- the bone grows;
- without varnishing will not last longer than a few months.
The advantage of clay is the ease of applying symbols in the process of molding dies. To work with clay, proper firing is required. The strength of the material is low: over time, the dies will break.
A popular material is salt dough. There are many cooking recipes, with proper care and coating with protective compounds, the product retains its appearance for a long time.
Do-it-yourself rune making - important nuances
When making runes with their own hands, they follow the canons of the mark, the rules for their use. After creating the dies, the symbols are cut out: the products need embossed ones. After cutting, they are painted. The procedure is reported Elder Edda:
Runes you will find
and see the signs
strongest signs,
strongest marks,
Hroft painted them,
and the gods created
and Odin cut them out,
Aces have one
and Dain with the elves,
Dwalin at the dwarfs,
among the Jotuns Asvid,
and I cut them myself.
Can you cut?
Are you able to guess?
Can you color?
You can not start work without knowing its symbols.

Multicolored runes
Coloring is done with red paint, for example, ocher. Following the ancient Scandinavian traditions, the product is stained with blood. From the point of view of cruel tradition, one drop of blood is enough in a vessel with red paint: the principle is important, not the amount of liquid.
You need a place to store: a box or a simple bag. Pouches are considered traditional accessories. The storage place for the magic instrument is made independently, but this is not critical.
Having created signs, they are used for divination and magical rituals. To cope with the case, one symbol is chosen as an amulet. The stones are constantly in direct physical contact. Symbols will be helpers in meditation, especially. In order to keep attuned to the stones, they look at them several times a week, sort them out in their hands.
In self-production, they listen to themselves. If you like the created plates, whether the signs are beautiful or not, it does not matter. If you don’t like seemingly ideal pebbles, symbols will not work.
Having considered how to make runes for divination and what is best to make them from, anyone can easily cope with the task. You don't need to buy expensive tools. Self-made pebbles are cheaper than store-bought ones, not to mention effective.
In contact with
If you were wondering how to make runes with your own hands, so this article will be useful to you. Working with the ancients is not easy, it requires great patience. You must know the important rules and follow them.
The magical science of sacred runic signs has existed for a very long time. This knowledge has been passed down from generation to generation. Magic is a subtle substance that does not require additional attributes.
But, since human nature depends on many factors (mood, emotional state, health), sometimes special items are needed to activate magic. A striking example is the rune symbolism - it helps the magician to tune in to the right wave and clearly go to the goal.
If you still decide to create a set yourself, read the general rules for making runes:
- The first thing you must do is define a goal. Answer for yourself the question: why do I need a runic set. This step is very important, since the ancient symbols are a very serious tool in the world of magic. They do not tolerate jokes and disrespect. And, if you started the process, be sure to bring it to the end.
- Before work, practice writing signs. It is no longer possible to correct an uneven line in the set. Runes love precision, so if drawn incorrectly, they may refuse to work.
- Work only in a good mood. Throw away all bad thoughts, evil emotions and sadness. This is, first of all, energy work. The success of the work begun directly depends on your condition - both physical and spiritual.
- Choose the material that you like. You have to work with him, so follow the prompts of your inner voice.
- There is no need for haste in this matter - actions must be measured and accurate. Don't set deadlines for finishing work.
- Try to feel each character. Hold them in your hands and forge a spiritual connection.
- There are some details regarding the drawing of signs. Lines that go vertically, draw from top to bottom, and those that are located diagonally, from left to right.
- To attract the energy of each symbol to yourself, do not be afraid to pronounce its name.
- Do each step on your own. There is no need to ask friends and family for help. This process is individual. In a way, it can be called intimate.
By learning how to make runes correctly, you can create your own personal amulet that will serve you for a very long time.
What materials are runes made of?
There are many materials for making runic signs. In this matter, your inner instinct plays the main role. It should tell you the most suitable option - and you should not go against your own intuition. That is, what to make runes from, choose only for you - any magician will give such advice.
There are two classic options - stone and wooden dies. Also, quite often esotericists use the following options:
- leather;
- bone;
- metal sets;
- clay.
More recently, salt dough has become popular. Dies are formed by hand, and to consolidate the result, they are baked in an oven.
Everyone will be able to make runes with their own hands - but for a positive result, a decisive attitude is needed.
How to make runes with your own hands from wood?

Wood is what rune paraphernalia is most often made of. Probably, it depends on the fact that it is wooden objects that are closest to the natural elements. And yes, they are very easy to work with.
Who chose this option for themselves, begins to think about solving another question: what breed to choose? And there are no restrictions at all - choose any. You can completely trust your intuition.
Now let's look at the sequence of actions:
- First of all, make special blanks. These are small rectangular figures, they are commonly called dies. Cut them out with a professional tool. In total there will be 25 dice (as you remember, there are 24 runes in a row, and there is also an empty dice called).
- The next step is to apply symbols on a wooden surface. You can burn sacred images, carve with a chisel or draw. In ancient times, blood was used for this purpose - if you want to complete the entire procedure thoroughly, use this option.
- Finishing the process, cover the wood runes with varnish.
Making runes from wood with your own hands is not a difficult task. The main thing is faith in their strength.
How to make runes at home from stone?

In second place are stone symbols. Often for a set they use ordinary pebbles, which can be collected on the shore of any reservoir. It is important that you pick up only those pebbles that your soul will reach for. Another advantage of pebbles is their shape - it is quite easy to match pebbles of the same size.
But when working with other natural minerals, this task is somewhat more complicated. A lot of time will pass until you deal with the preparatory stage.
It is better to collect stones in places where few people walk - so they will not be polluted by alien energy.
How to make runes yourself:
- First, wash off the negative energy from the pebbles with water. To do this, just place them under the stream and hold for about 5-10 minutes. Let them dry on their own.
- If you want to create a monochromatic set, cover all the minerals with a colorless varnish. If you dream of making multi-colored runes, then use colored varnishes. Let the plates dry well.
- Now it's time for the symbols themselves. Enamel paint is best suited - it is durable and durable.
- It will take about a day for the paint to dry. Then varnish the stones again. They are ready for the activation procedure.
How to make runes yourself from other materials?

Interesting
If you want to learn how to make runes with your own hands, you need to have at least basic knowledge about them.
Magical science has existed among us since ancient times. Starting as magic, it gradually flowed into the concept of "magic". The people who took possession of it during the time of the Inquisition were, for the most part, burned at the stake. But those who managed to survive passed on their knowledge to others and thus left it for centuries. Today, few people live with magical abilities, but they all perfectly master their skills.
In general, magical practice is a certain position of the body and consciousness in space and time: it does not require any charmed objects or amulets. However, man is a living being subject to and influenced by mood swings. Especially in order that this does not interfere with the qualitative manifestation of magic, special items were created. Thanks to them, any magician, no matter how bad his mood, can tune in to the right wave and enter the astral plane faster.
Runic magic is one of the varieties of magic. It uses many charmed items, but the most effective and often used are runes. Used in a set consisting of plates and a runic alphabet, they are able to give out much more information than other types of properties.
Where can you buy runes?
You can purchase a rune set for yourself in three ways:
- In souvenir shops or specialty stores. Sets are sold as items for divination, but do not have sufficient magical power.
- Practicing magicians. They sell runes already consecrated.
- Make runes with your own hands from stones, clay or wood. However, for this it is necessary to do everything in strict accordance with the proposed instructions. But in return, you will receive plates that have been spoken only to you.
In any of these cases, you can become a full-fledged owner of the rune set.
Varieties
Runes are made from a variety of materials, and each of them has its own magical meaning. Can be distinguished:
- Made from wood. Such runes are the most revered and most versatile. They can be applied daily.
- Carved from stone. If you have not yet decided what and how to make runes with your own hands, then you can choose a stone. It is ideal for all kinds of influences.
- Made from leather. Ideal for those who want to improve their financial situation.
- Clay runes. They are most adapted to divination on earthly matters. The polymer base is especially good. It is believed that it is most likely to include spirits with whom you can later establish close contact.
- Black magicians make runes from the bones of animals or dead people, the teeth of a person or animals, from nails.
Technique for making wood sets
When deciding to create runes on their own, a person can choose wood or clay. These two types of material have approximately the same properties:
- They are easily conductive.
- Through them it is easier to learn about your destiny.
- Ease of material handling.
If it is impossible to use polymer clay, it is recommended to use wood. Moreover, taken from a living tree, ash or oak - both of these species are closest to the sacred in the belief of Asatru.
- The first thing to consider is that it does not matter how you processed the plates. They can be uneven, different in length or thickness. The main thing is that you like them and do not break when applying runic signs.
- Apply the image of a runic symbol to each blank. You should use a pencil or a thin marker for this.
- Cut out each rune. It is recommended to use clerical or stationery for this work. After cutting, you should not worry about the mismatch of the original with your set. The main thing is that they are comfortable for you and retain the main contours of the product.
When the blanks are completely ready, proceed to painting. You can use permanent paint. However, she is unable to maintain constant contact with the summoned spirits. To fully communicate with them, you should use your own blood. You can get it in two ways: by making an incision on your finger or in a medical center. In the first option, it is recommended to pre-sterilize a fragment or a cutting object. In the second case, you can ask a health worker you know to take blood from a vein and take it with you.

Features of each stage
- Preparation must be done separately. Each rune must go through all the stages separately from the others. It is recommended that you take your time with this procedure - ideally, if the whole process will take you about 2-3 months.
- Feel the rune. At the time of preparation of each symbol, it is recommended to feel unity with the material. When cutting through or punching a rune, you should imagine its image. Only in this way will you be able to correctly set the plate to work.
- Don't like it - redo it. After coloring, you need to look at the rune again and listen to your emotions and feelings. If the record is negative for you, throw it away and create a new one. Examine them often, hold them in your hands or put them under your pillow. Proximity and unity are the most important conditions for the successful creation of a rune set.
Proper storage
So, you carved your set, also dealt with the question, (runes) with your own hands. Now another, no less important question arises: how to store them correctly?
Here the most important condition is the complete secrecy of the location of the runic set. This is due to such a nuance as the storage of your personal life force. With the correct execution of all stages, the runes should retain part of your strength, which is necessary for successful and fruitful communication with the spirits.
When falling into the wrong hands (even relatives), your power can be used both against you and against another person. With the first option, you can die, with the second, you can become seriously ill. To prevent this situation, you should not let anyone see your set.
All runes should be stored in a special bag. It can be made from different materials. It can be applied to the image of Odin or any other Scandinavian god. This pattern will give extra protection to your records.

How to set the runes to work?
The hardest part about working with runes is getting them to work. It requires a well-developed imagination, accuracy and sequence of actions.
The "charging" of the amulets is performed as follows:
- How to make runes with your own hands - you figured it out, now you should imagine the image for which the creation of the plates was started. It is important that there are about three of them.
- The image must be realistic. You should not imagine a keyhole as a security - it is better to imagine yourself in a house filled with warmth and tranquility. This will allow you to set up a kind of protection code in the amulet against someone else's intrusion.
- Selection of an energy source. It is forbidden to use yourself as a source. So you will only waste all your reserves without saving anything. Ideal - connection to other sources.
- Full compliance of the source with the purpose of application. In order for the amulet to work constantly, you should select one main and two additional sources. It is important that they match your goals. For example, when protecting people from negativity, you should connect the amulet to their emotions. And if you want to treat - to the natural environment.
To make the runes work to their full potential, you can program them to hibernate. The set will work when the source is activated and "sleep" - when its activity declines.
Features of creating runes from stone
To learn how to make runes with your own hands, the master class is worth reading carefully.

Along with making a set of clay, you can also use stone. Its processing and preparation is fraught with the following features:
- When looking for a suitable material, you should carefully listen to your inner feelings. If you like the stone, you should take it with you. No - it is recommended to return it to where it lay.
- In total, you should collect about 26 stones. It is desirable that they all have a size of about 3 centimeters in circumference. However, they must have a flat, oval or round surface.
Manufacturing sequence
Once suitable products have been found and meticulously selected, they should be thoroughly washed with soap and water. At the end of the water procedure, the stones should dry thoroughly in a bright place. This may take as much as one hour, or all three.
Dry pebbles should be varnished with a transparent shade - mother-of-pearl or colorless.

- Preliminary work. It includes patterning practice. Before proceeding to the stone, you should try how to make do-it-yourself runes out of paper: hard or easy?
- Main stage. It is required to prepare the following materials: blue enamel paint, cocktail tubes, soft cloth. Then you can start drawing runes. The paint is applied with a stick and at the same time the name, meaning and connection are spoken out. If this condition is met correctly, the amulet will be charged with energy.
- Execution technique. Each character must be drawn according to the rules. Vertical lines originate from the top, while diagonal lines originate from the left. In total, you should get 24 drawn and one empty rune. The latter belongs to Odin.
Where can I get clay for making plates?
Before you make runes with your own hands in stages, especially from clay, you should correctly find places to search for material. You can find it in the following places:
- In the store - ready-made. The simplest and most unreliable option. Clay will not receive the necessary charge, and the runes themselves will be deprived of their individuality and full strength.
- In the form of dry mixes. They are sold in hardware stores and diluted at home. However, such clay will also not be effective enough, as it will remain dead.
- Outdoors. It should be searched on slopes, in lowlands and other places saturated with moisture. Such clay, obtained by labor, will receive a maximum charge and remain alive even after processing.

Clay preparation rules
After the clay is brought home, it should be shaped into a future plate. Then the workpiece is rubbed with a soft object and laid out on a lighted place or near a heater for drying. The process takes about a week. It is important to cover each plate with a bag with a little air for a couple of days. After hardening, the package is removed.
After drying, all products are fired. This procedure is performed as follows. Sand is laid out on a solid cast-iron surface, plates and a pot are placed on top. Heating should be done slowly: from a low temperature to the highest. The heating process should last 6 hours.
Before you make runes with your own hands from clay, the blanks must be completely dried.
Writing symbols on clay
Before you properly make a fehu rune with your own hands, as well as subsequent runes, you should prepare brushes and paint.
All further procedure is performed in the same way as when working with a stone. As a coloring material, you can use paint, gouache or your own blood. One thing to keep in mind: when applying the last remedy, several layers must be applied - in order to avoid absorption and image loss.
What do you need to know about runes?
When studying runic signs, you should carefully peer into each image of the symbol, and also remember its meaning: it will depend on how well you can master this art. It is advisable to memorize all the names with an understanding of their true meaning.

What is not allowed at work?
After reading how to make runes with your own hands, making will be the easiest thing for you. However, do not forget about the following prohibitions:
- Use a single power source for your set.
- Connecting runes to yourself or to other people - only emotions are allowed.
- Transfer the set to third parties or use others to achieve your own goals. You can use only those that are made independently, purchased in a souvenir shop or bought from a magician.
- Use excessively strong energy sources. They can consume you - without the right to life.
- Use an amulet to induce damage. It can come back and eat all your energy.
- It is not clear to imagine images.
Following these prohibitions will help you use the runes to one hundred percent.


